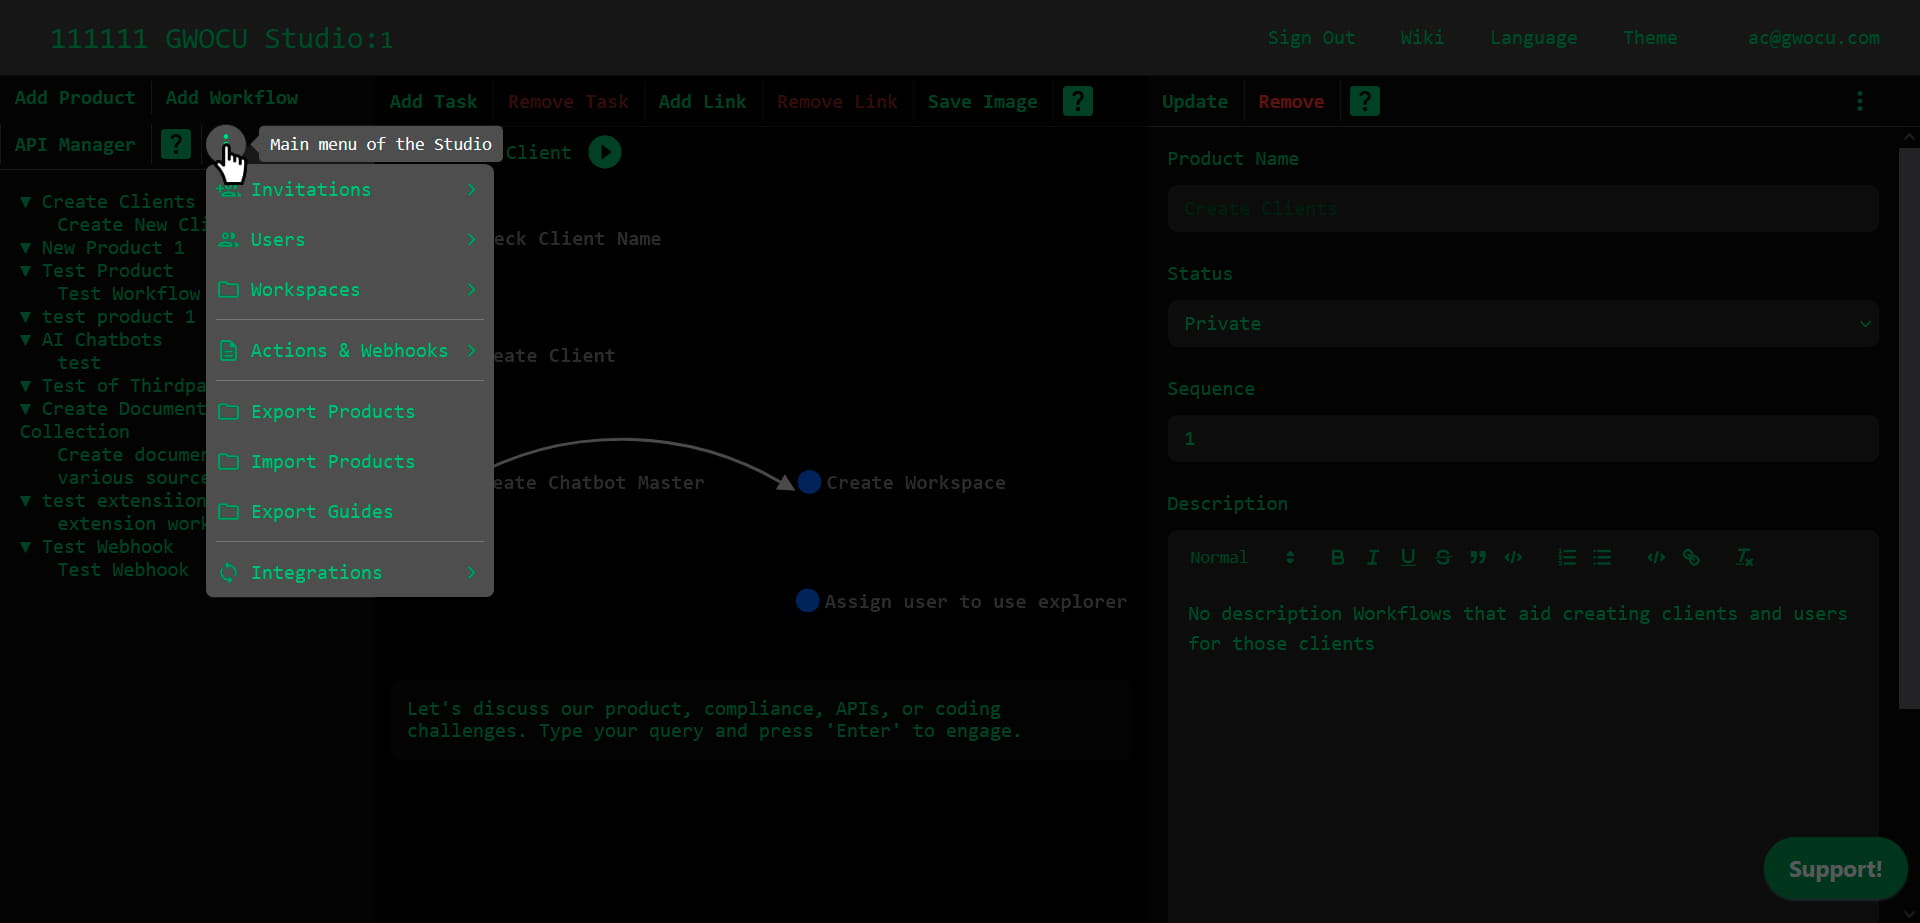
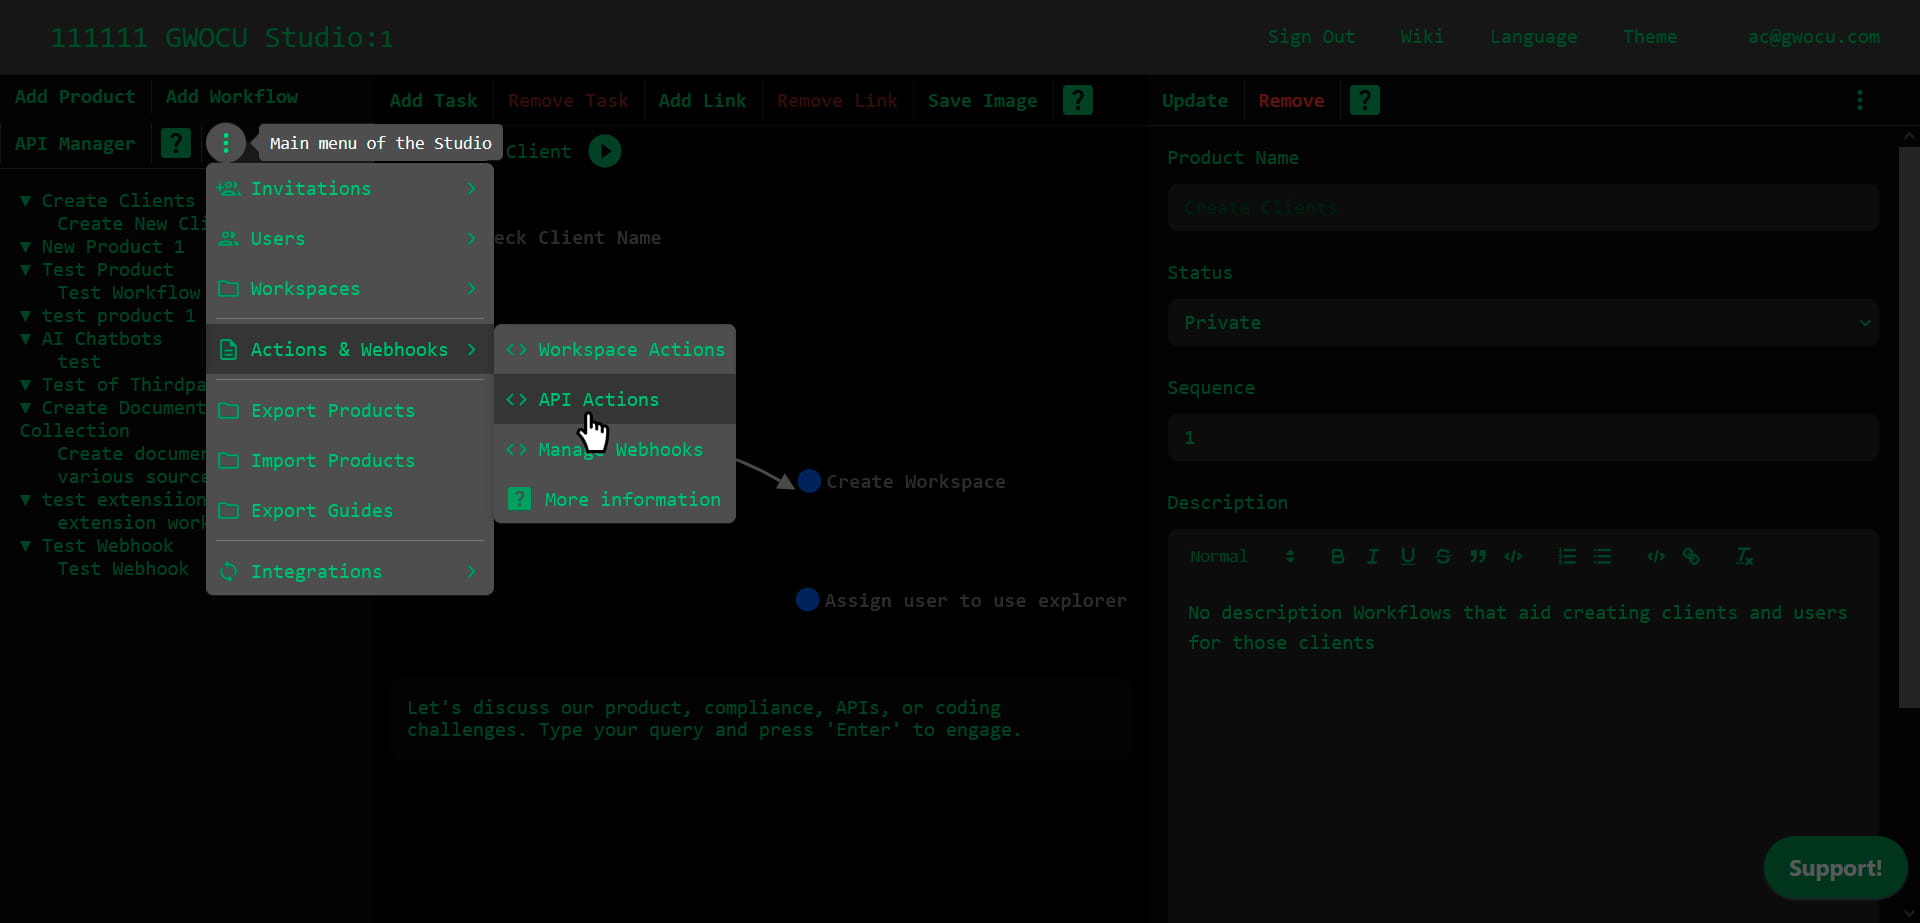
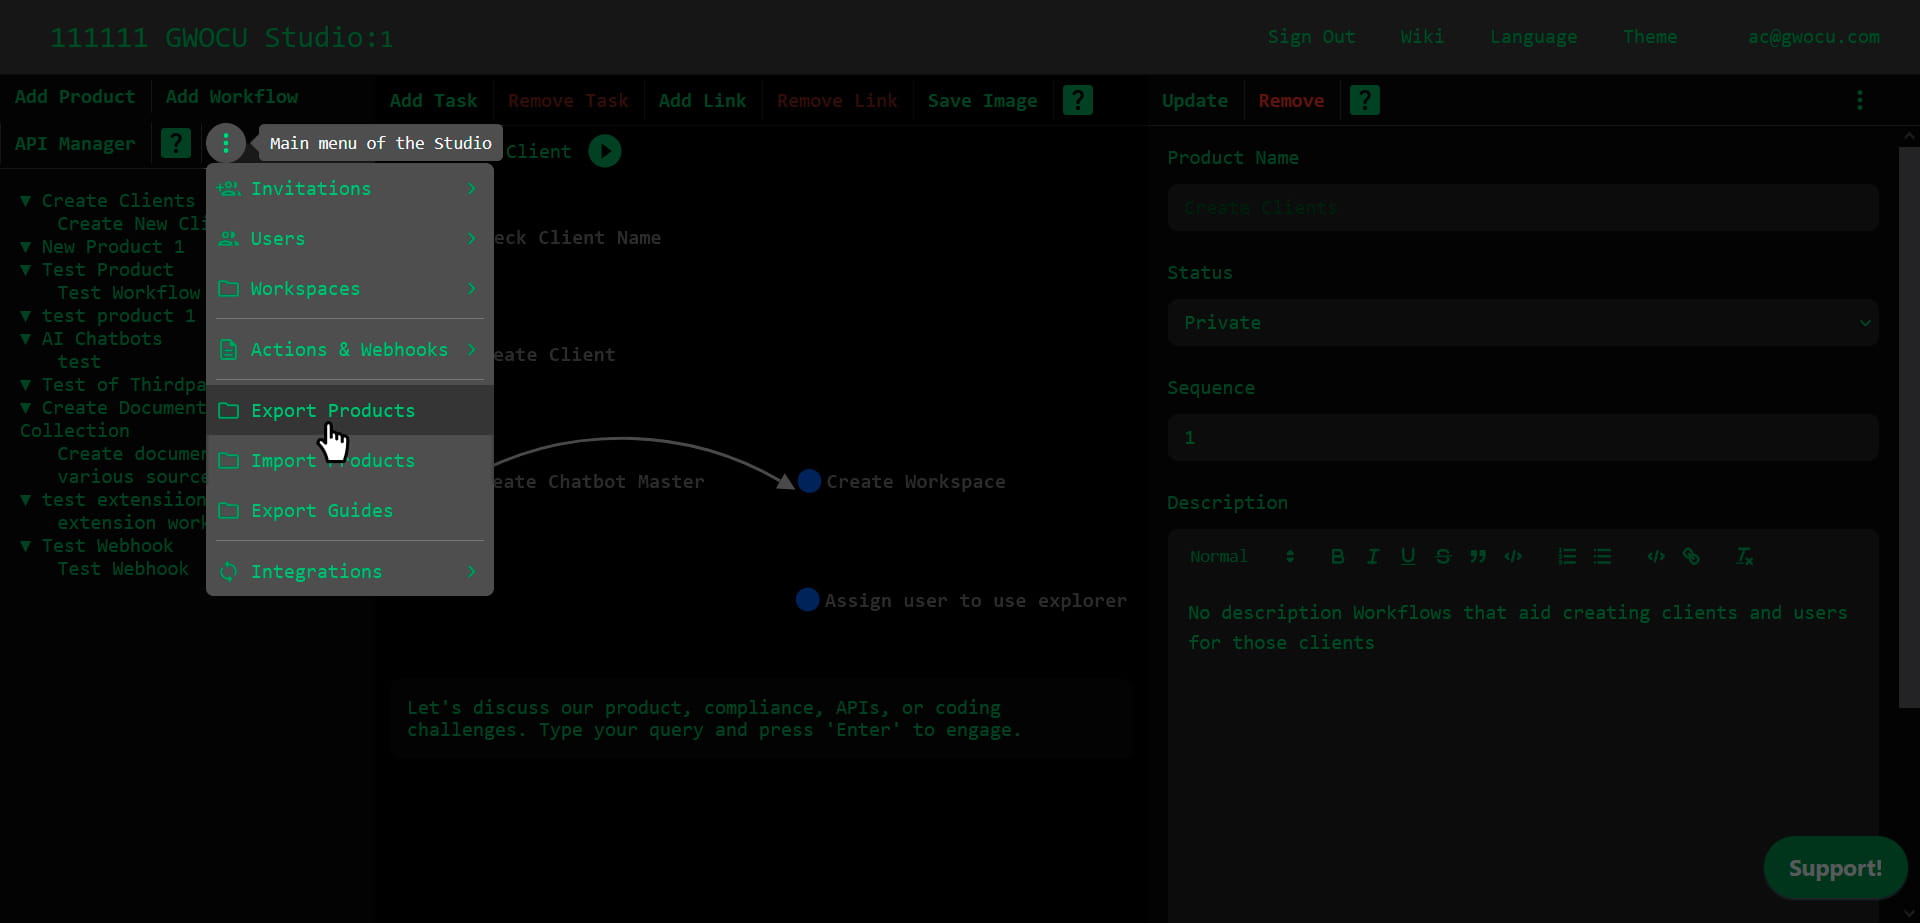
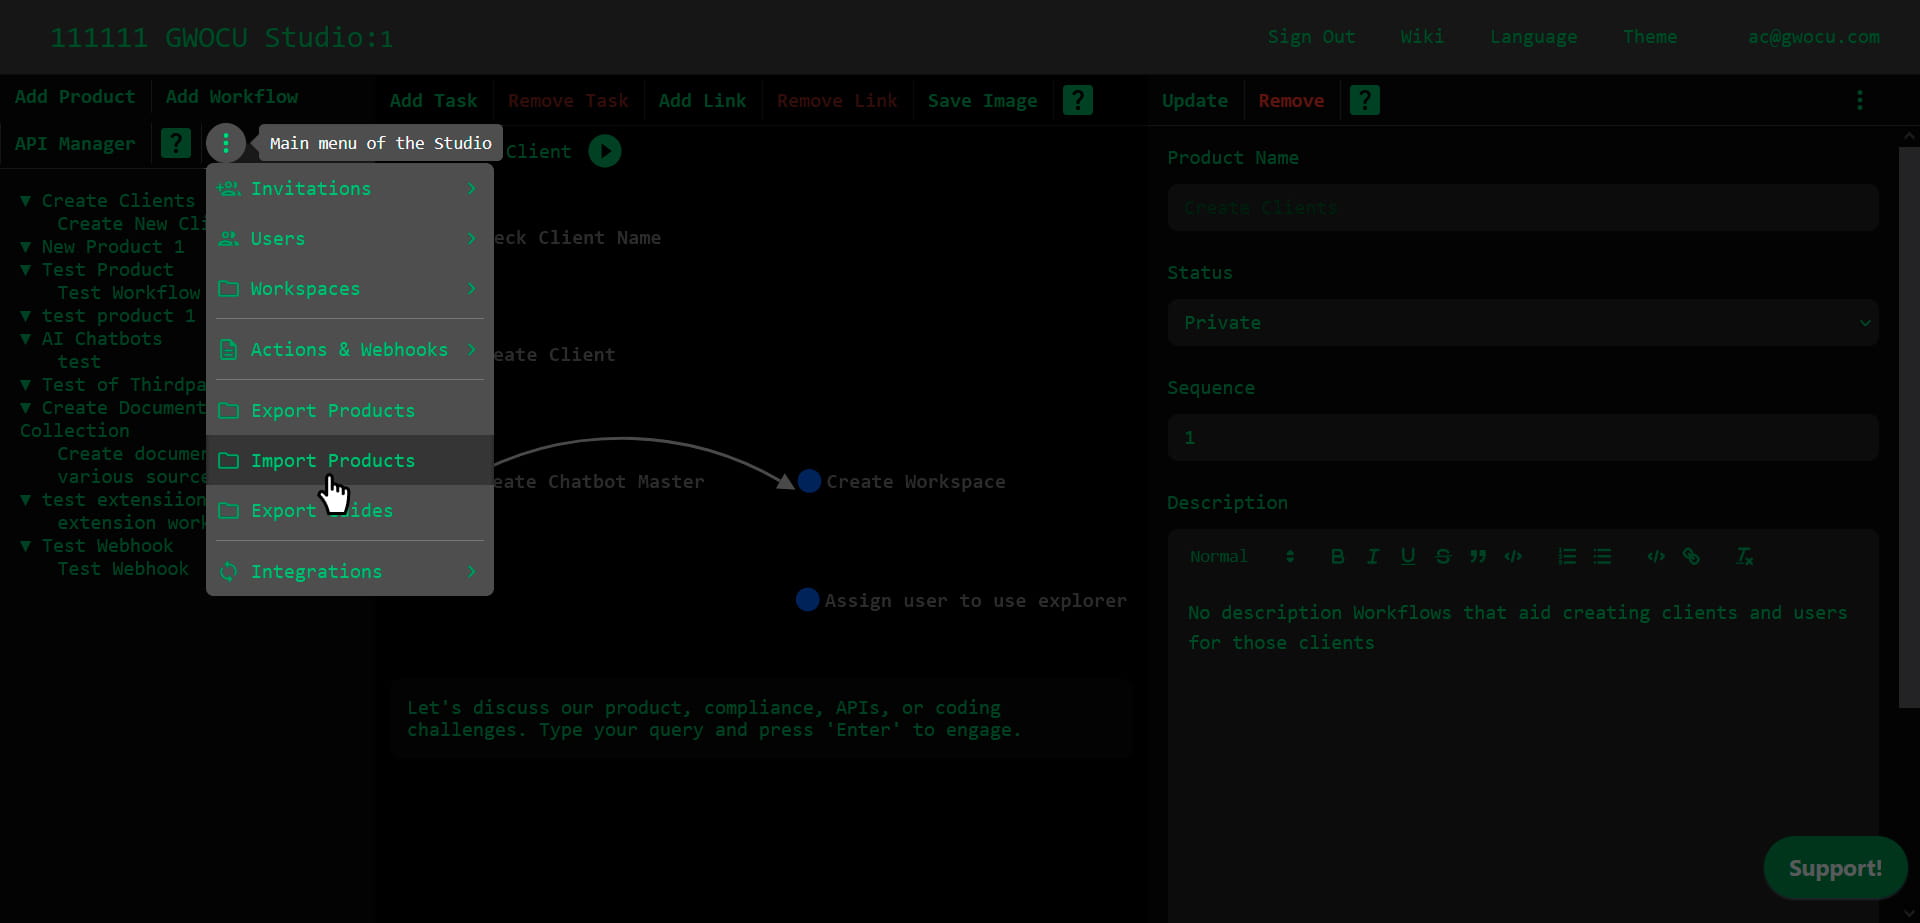
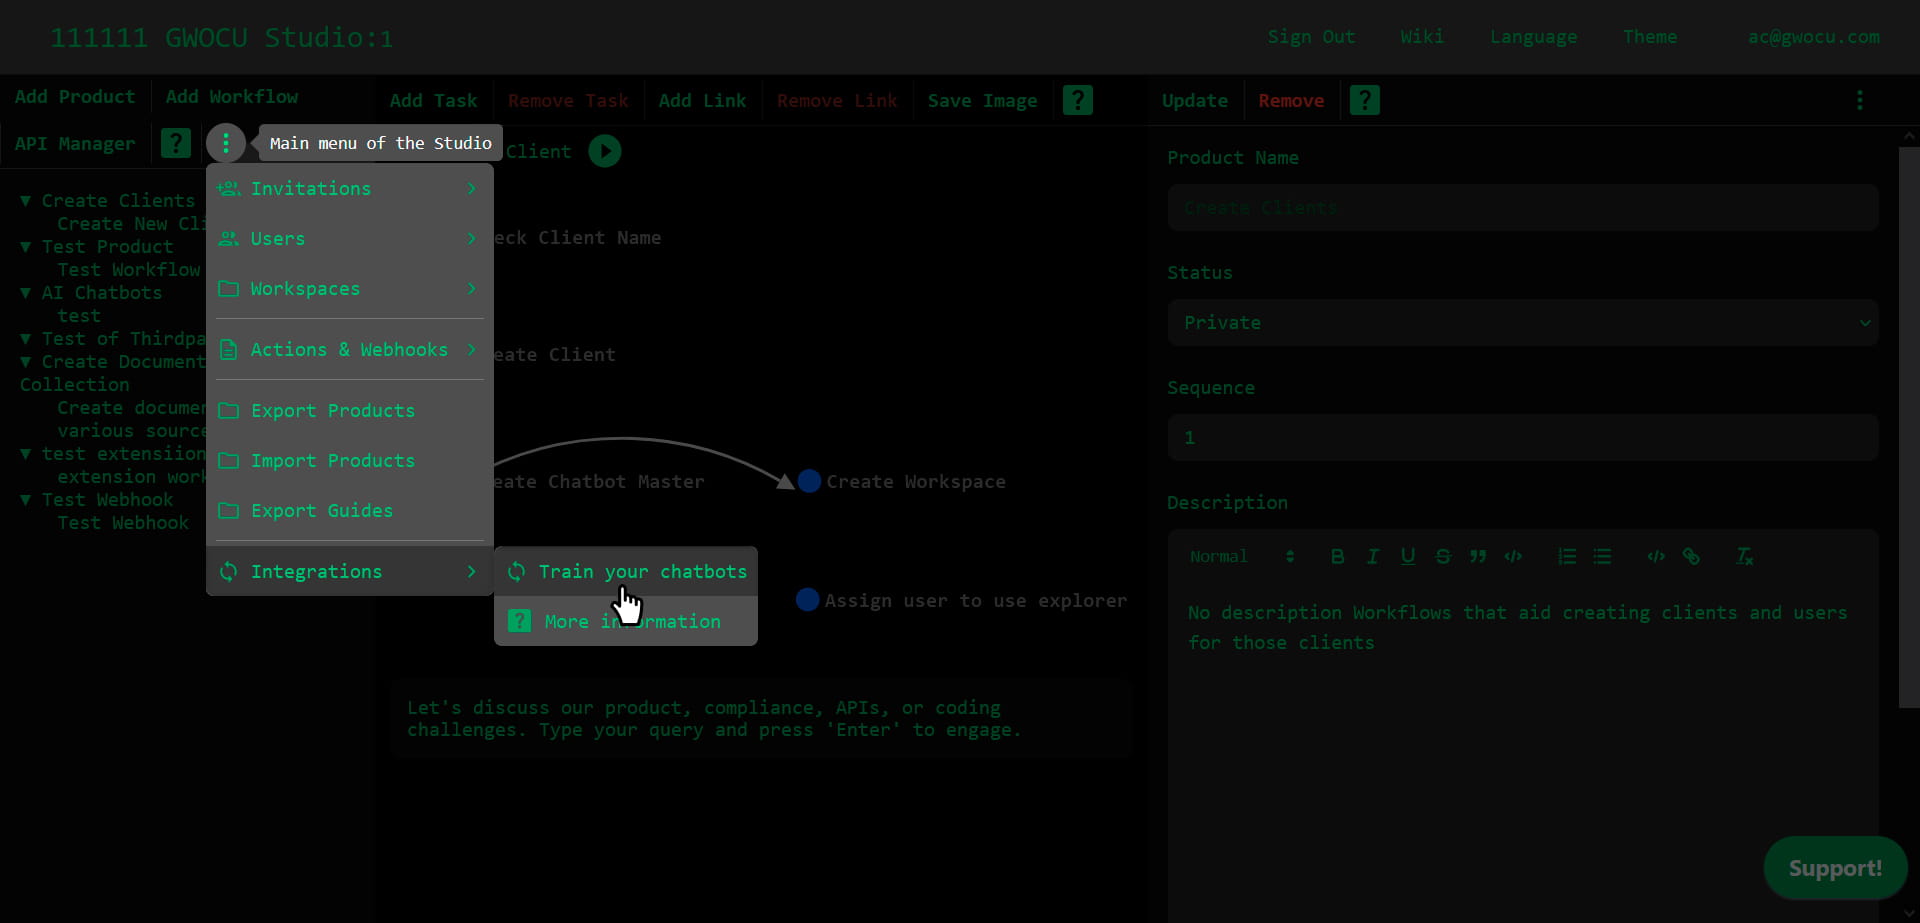
¶ Studio's main menu
The Studio's main menu options vary based on your role. Readers can export guides and navigate their workspaces. Designers can also manage webhooks, workspace and API actions, train chatbots, and import or export products. Owners have full permissions, including configuring system settings, managing invitations, users, and workspaces.
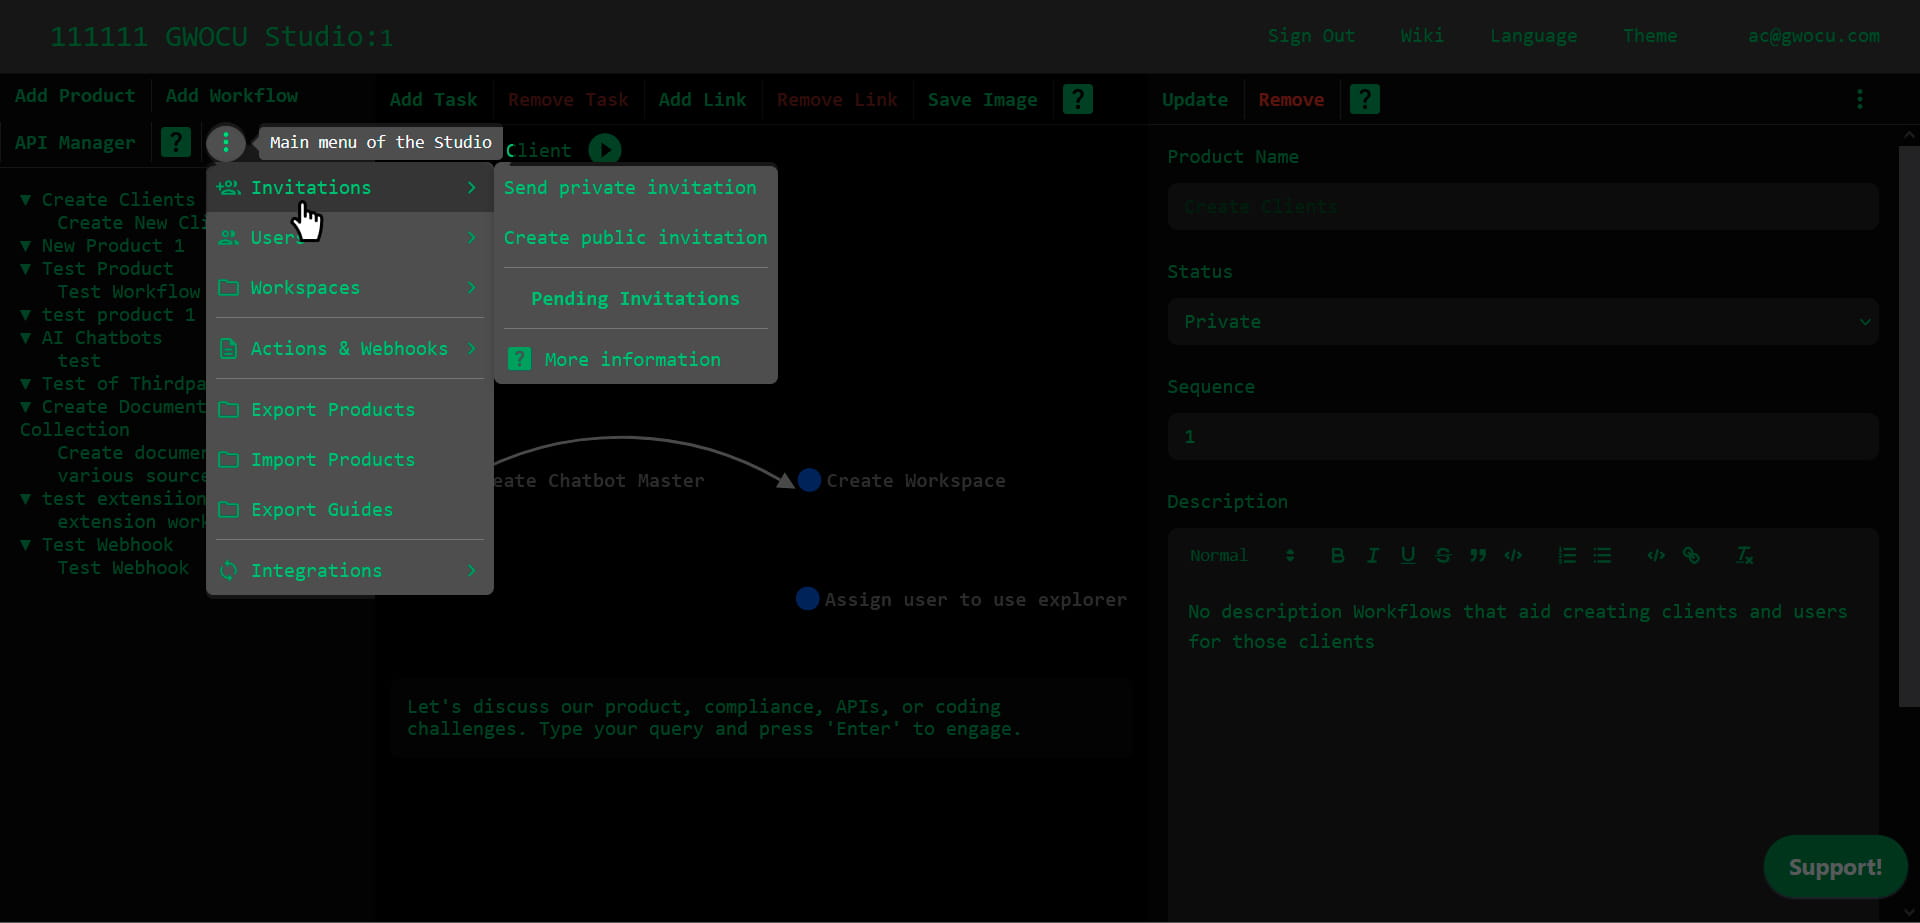
¶ Invitations
Owners can create public invitation URLs to grant anonymous access to a workspace or send private invitations via email to specific users. They can also disable public invitation URLs or cancel pending private invitations to control access to the platform.
¶ Send Private Invitation

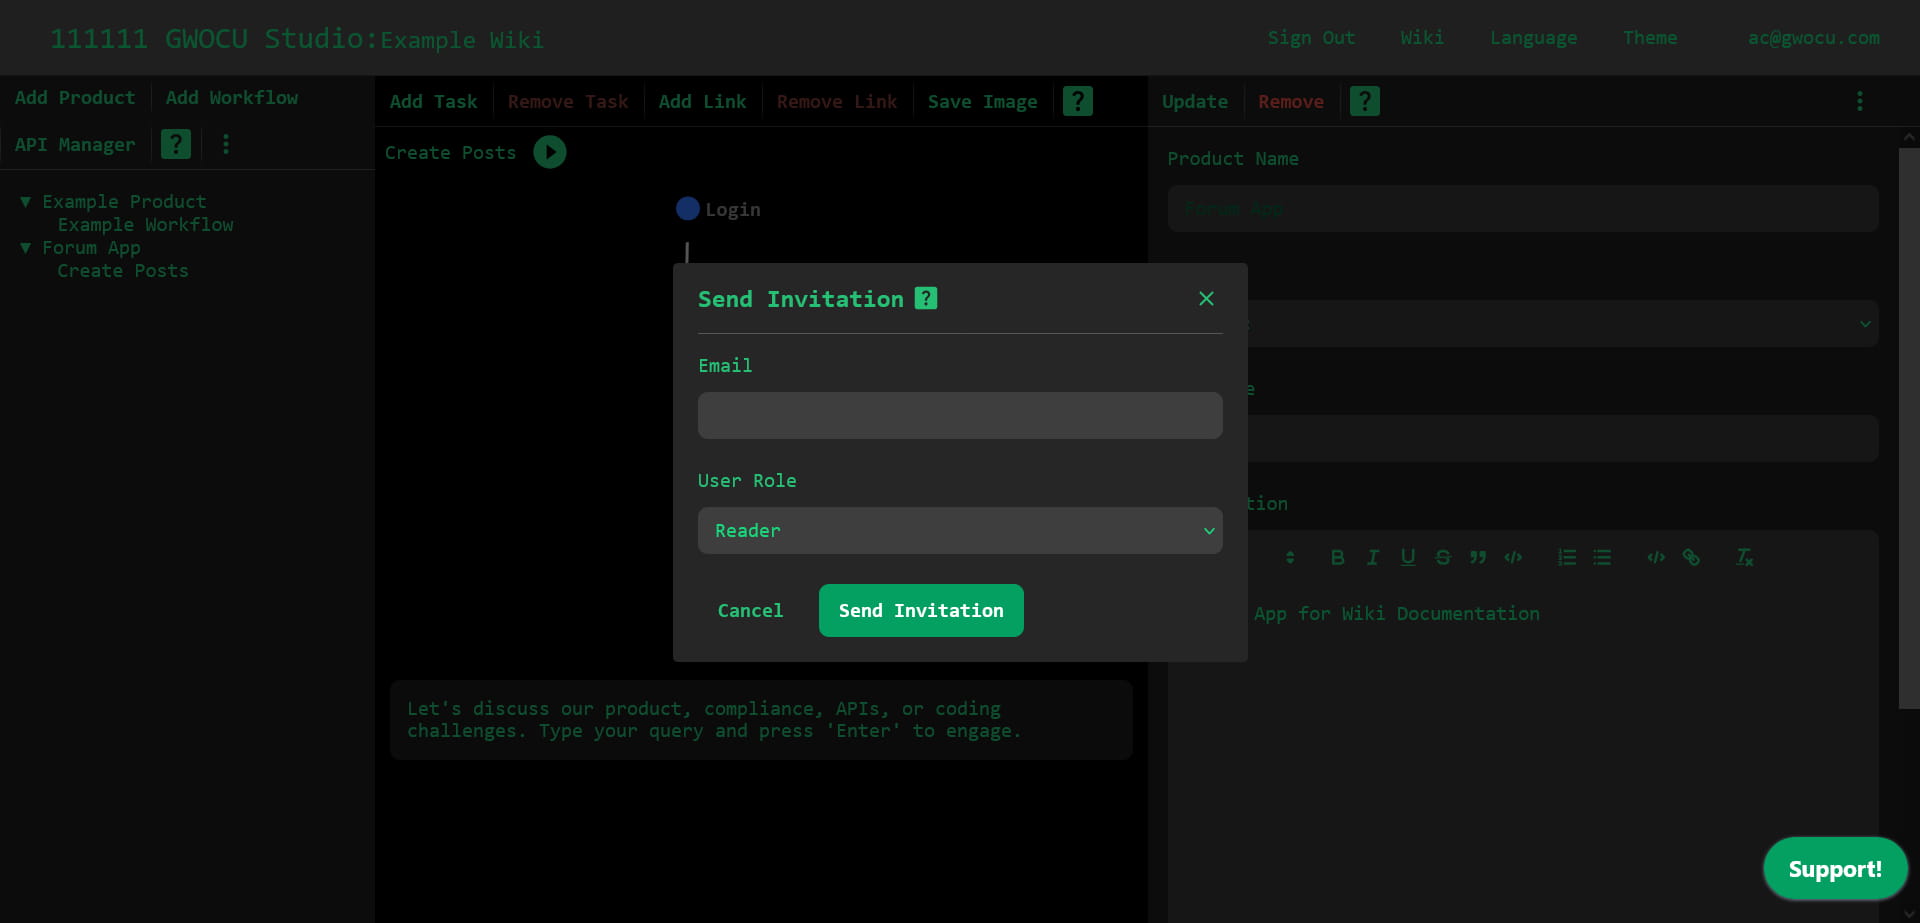
This dialog allows workspace owners to invite third parties to join the current workspace. If the invited user is not registered with that client, they will receive an email with a link to complete their registration by setting up a password. If the user is already registered with that client, they'll automatically be added to the workspace.
When sending an invitation, you must assign the user one of three roles: Owner, Designer, or Reader. You can change or assign more roles later. For details on the permissions associated with each role, see User Roles and Permissions.
¶ Invitation and Security Details
Private invitations are sent via email, accompanied by a secure, encrypted token that expires in 5 days. If necessary, you can delete an invitation using the invitation pending list available in the menu. This feature allows for the cancellation of an invitation if plans change.
¶ Create Public Invitation
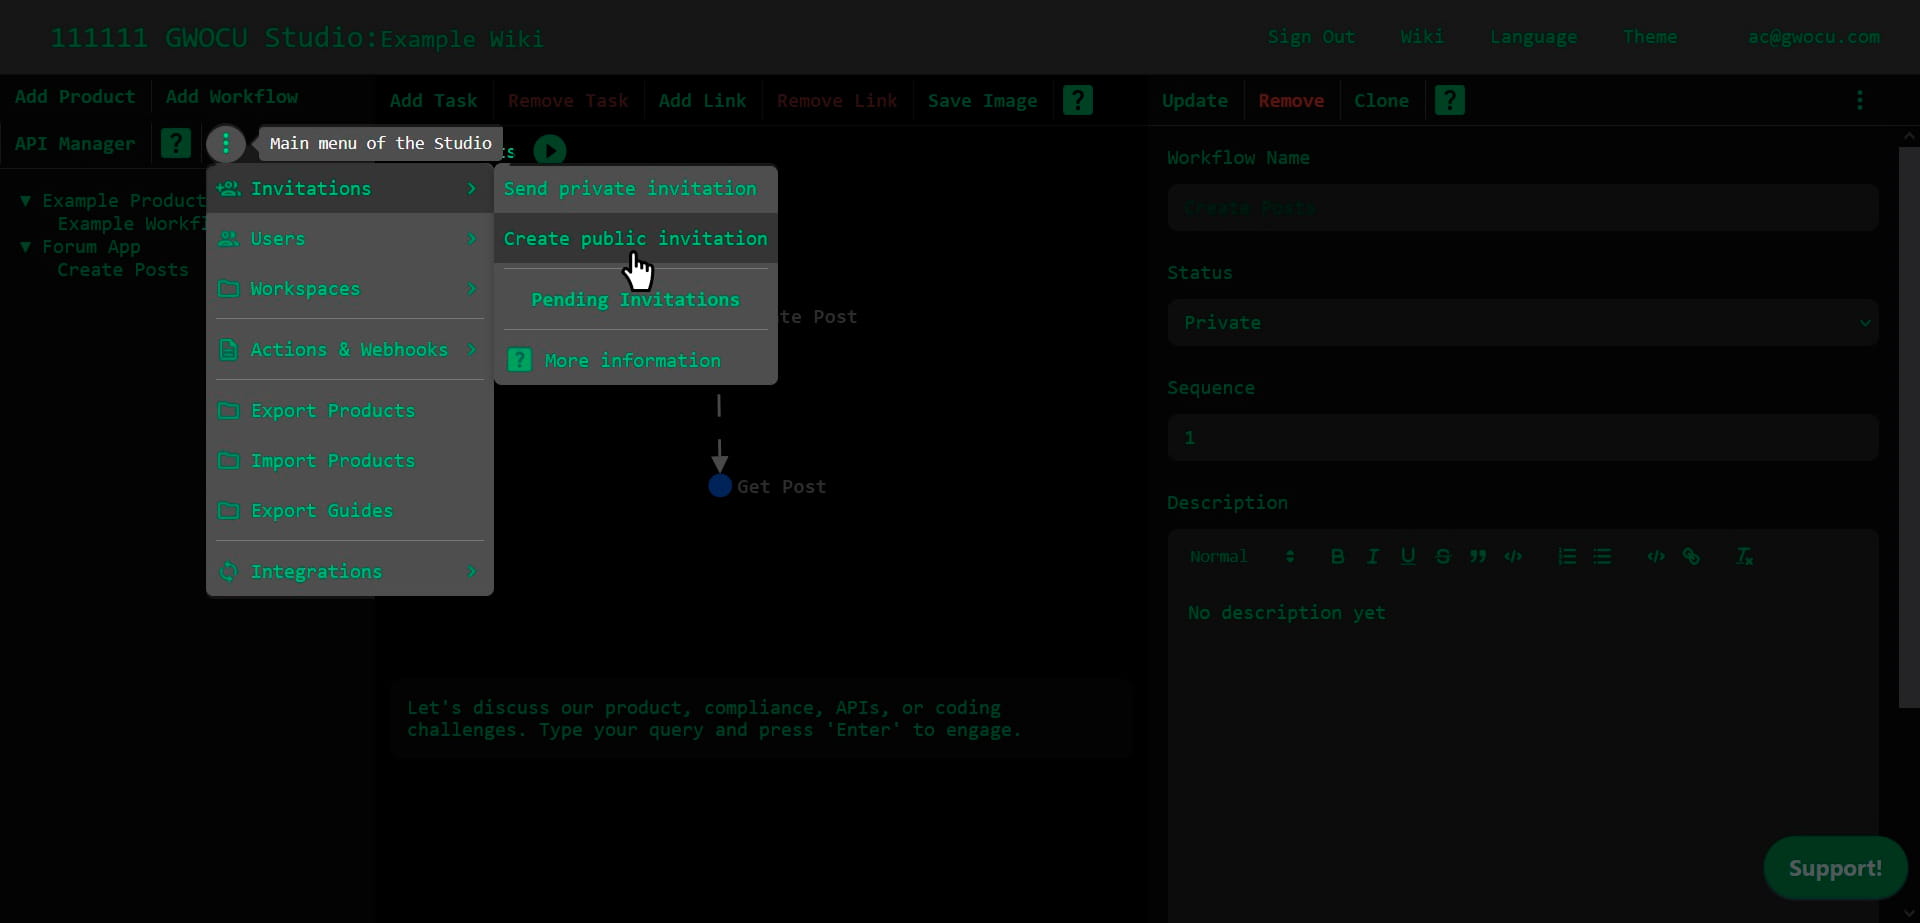
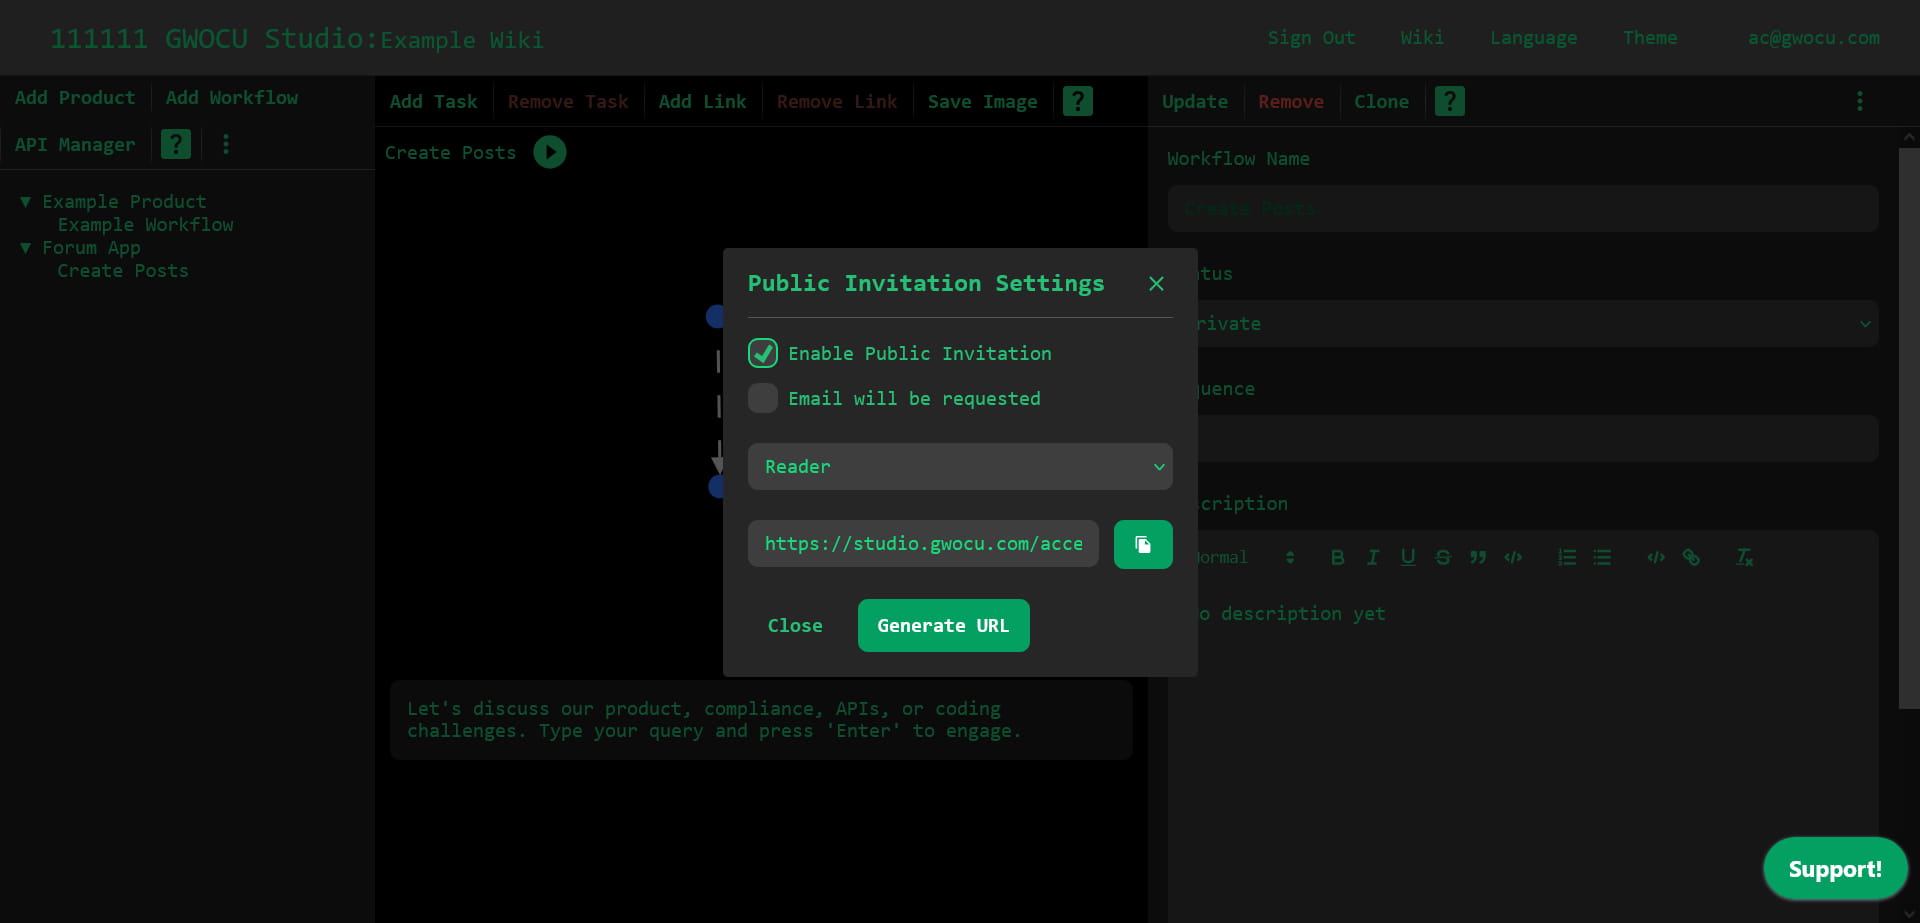
This dialog allows workspace owners to invite third parties to access the workspace via a URL, without requiring them to create an account.
Guests can only have one of three roles: Owner, Designer, or Reader. You must select a role when generating an invitation. If you create a new public invitation URL with a different role, it will override the role settings for all previously generated invitations.
For details on the permissions associated with each role, see User Roles and Permissions.
¶ Revoking Access
To revoke access through public invitations, uncheck the Enable Public Invitation option in the modal.
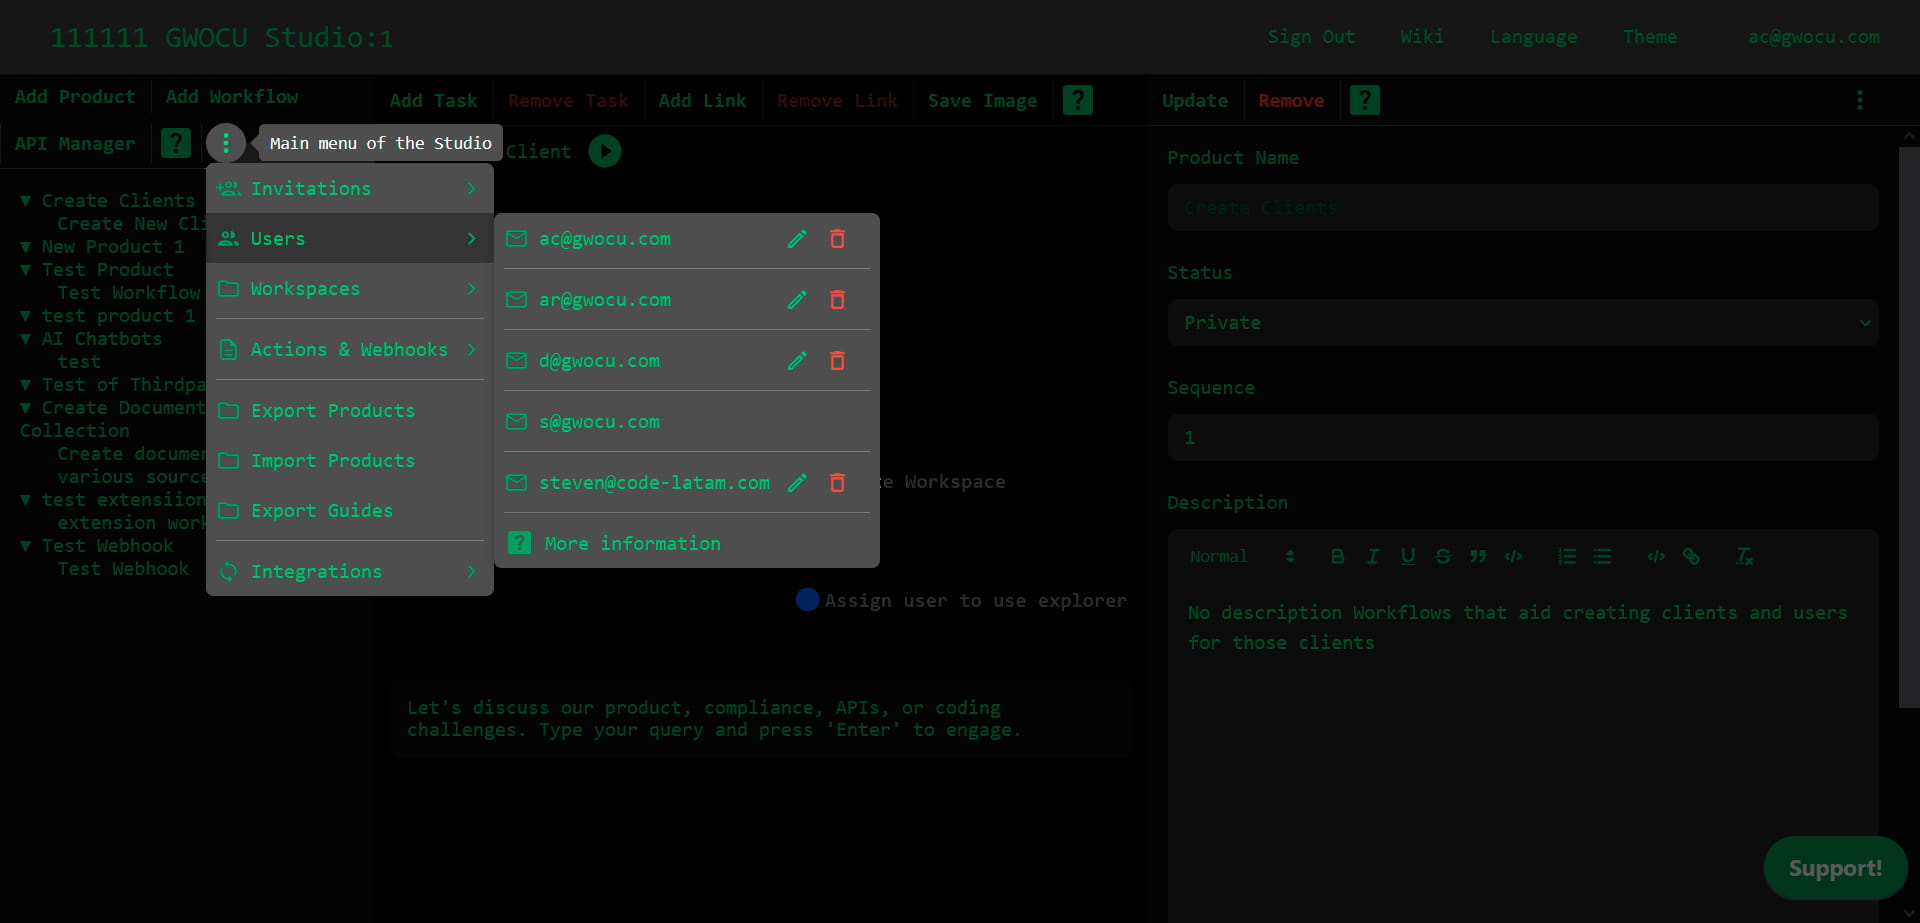
¶ Users
Owners of a workspace have the option of managing the roles and access of registered users in the workspace. Once an invitee accepts a private invitation, they become a member of the workspace they have been invited them to. An owner of that workspace can then use the "Users" option to see the list of users that are currently a member of the workspace.
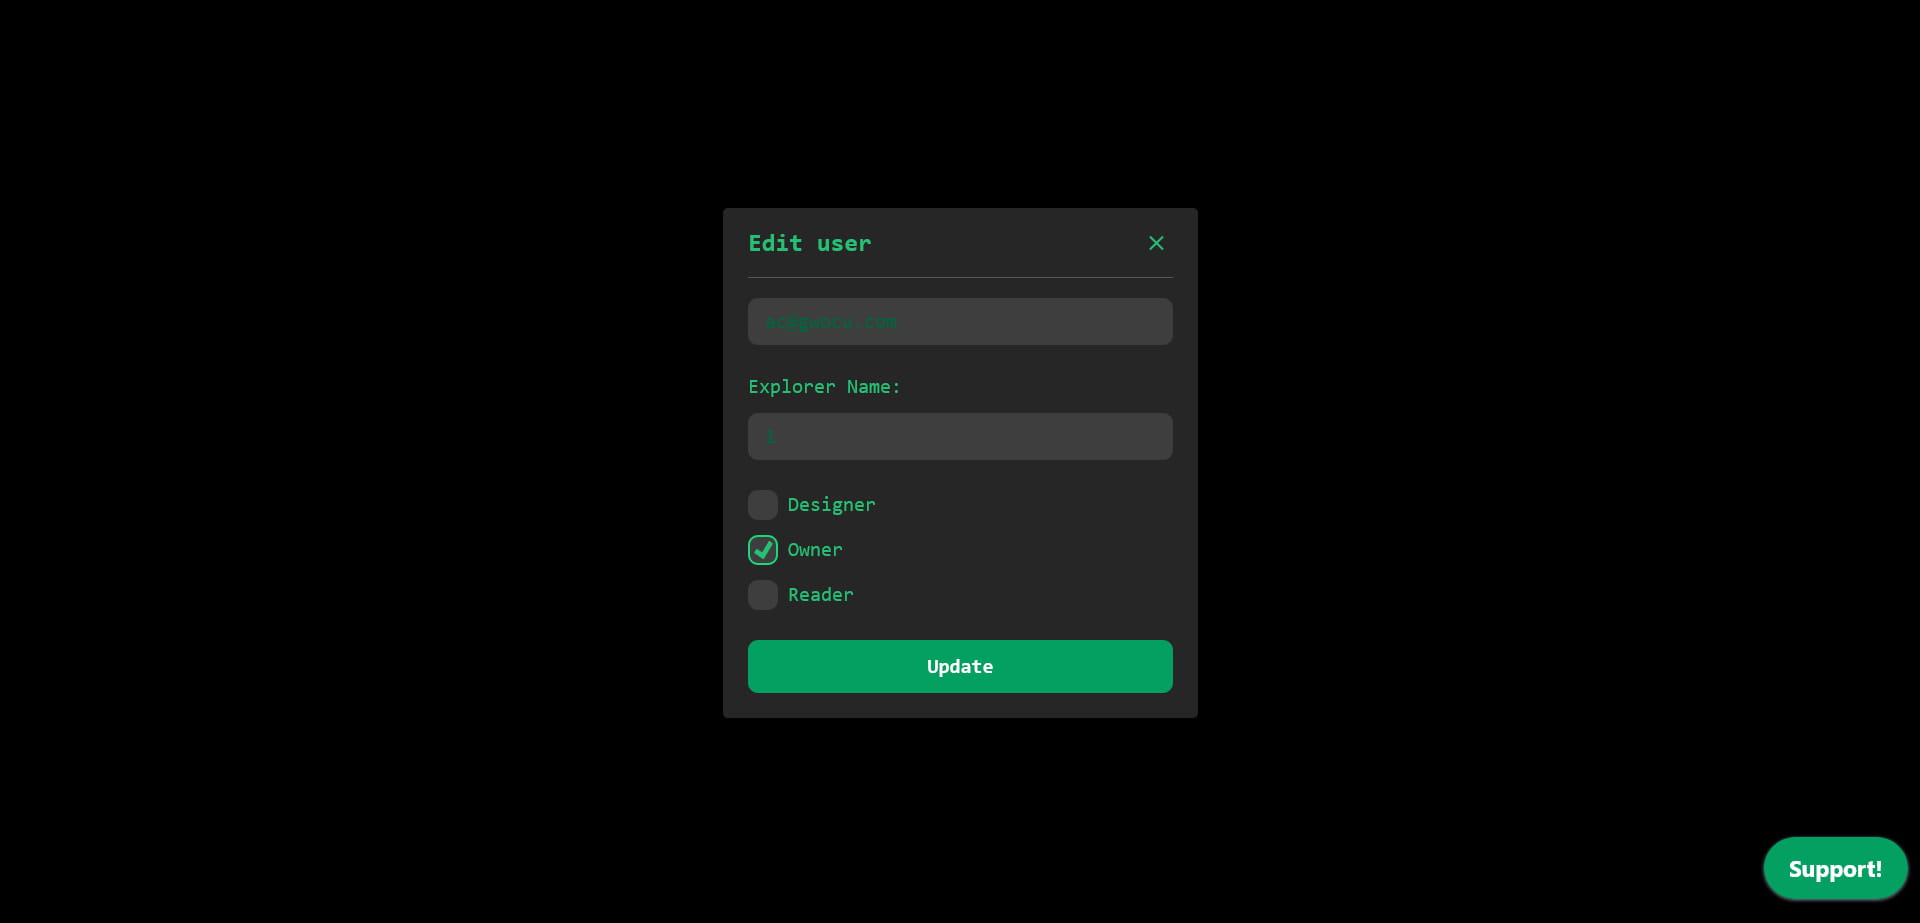
¶ Editing a user's role
As an owner, you can manage user roles for your workspace by editing the user's role using the "Edit User" button next to the user's email. Refer to the User Roles and Permissions section for details on what each role entails.
¶ Deleting a user from a workspace
Owners can remove other users from the workspace using the "Delete User" button next to the user's email. The first owner (the admin) of the studio cannot be deleted.
¶ Workspaces
Create and manage workspaces within the platform. Workspaces are dedicated areas where users can create API definitions, import data, develop custom products, and design workflows specific to their needs.
¶ Creating Workspaces
To create a workspace, navigate to the "Workspaces" submenu in the main menu and select the "Create New Workspace" option. If you create a workspace you will automatically be an owner of that workspace, even if you were only a designer in the current workspace. You can give the workspace any unique name of your preference.
¶ Visibility of the Workspaces
Only the workspace creator will become a member of the workspace when initially created. And only they will be initially able to see its contents. If you want more people to become a member of the workspace you first need to select that workspace and, from there, send them a private invitation or a public invitation URL.
¶ Deleting Workspaces
If you find you don't need a workspace anymore, you can delete it by using the "Delete Workspace" button next to the workspace name in the list. Note that you cannot delete Workspace "1" as that is the default workspace. When a workspace is deleted, all associated products, workflows and API definitions are deleted too. The process is irreversible.
¶ Customizing Your Workspace
Within each workspace, you have the flexibility to:
- Create and define API definitions.
- Import existing API definitions from external sources.
- Develop and manage custom products tailored to your operational needs.
- Design and implement workflows that streamline your processes.
¶ Exporting and Importing Workspace Data
You can export products and workflows from one workspace to another using the platform's export feature, which generates a YAML file specific to each workspace. This file can also be used to define workspace-specific authentication methods.
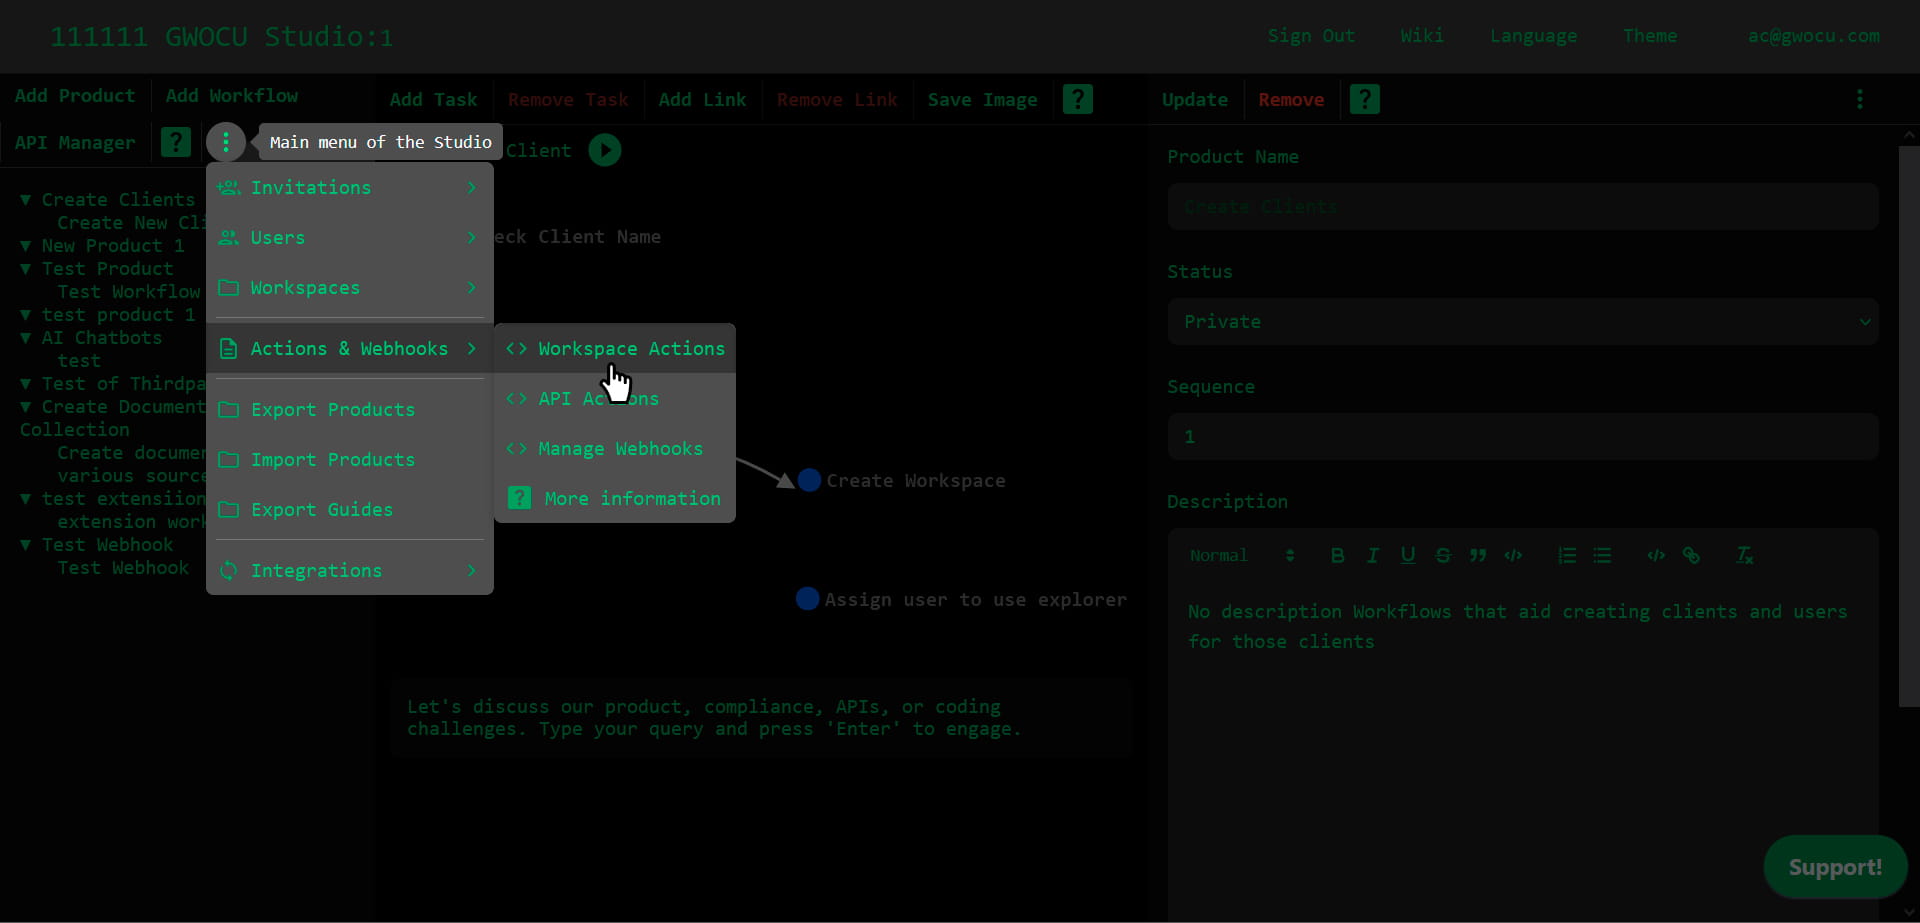
¶ Actions & Webhooks
Owners and designers can define global settings and run JavaScript code before API calls by using YAML configuration files, these are called "actions". Ensure the JavaScript and YAML syntax in your actions is valid.
- Workspace Actions: Execute for all API definitions within a workspace.
- API Actions: Execute only for the specific API definition they're associated with, overriding Workspace Actions for that API.
The Actions & Webhooks menu also offers the Manage Webhooks option. It opens a dialog from where you can register, configure, and manage webhook listeners to monitor and respond to API notifications in your workflows.

¶ Workspace Actions
This interface allows users to manage actions for all APIs in the workspace. A default entry is added for each workspace created. Workspace actions are particularly useful when implementing authentication methods. You may use them to affect the headers or request body of all the API calls in the workspace. Workspace Actions may be overridden by API Actions if the API definition is associated with an API Action. See next section.
¶ Importance of Workspace Actions
There are many other use cases where a Workspace action is needed. A Workspace action definition can have its own details specified in its corresponding YAML configuration file. For instructions on configuring the YAML file, see Action Configuration Files.
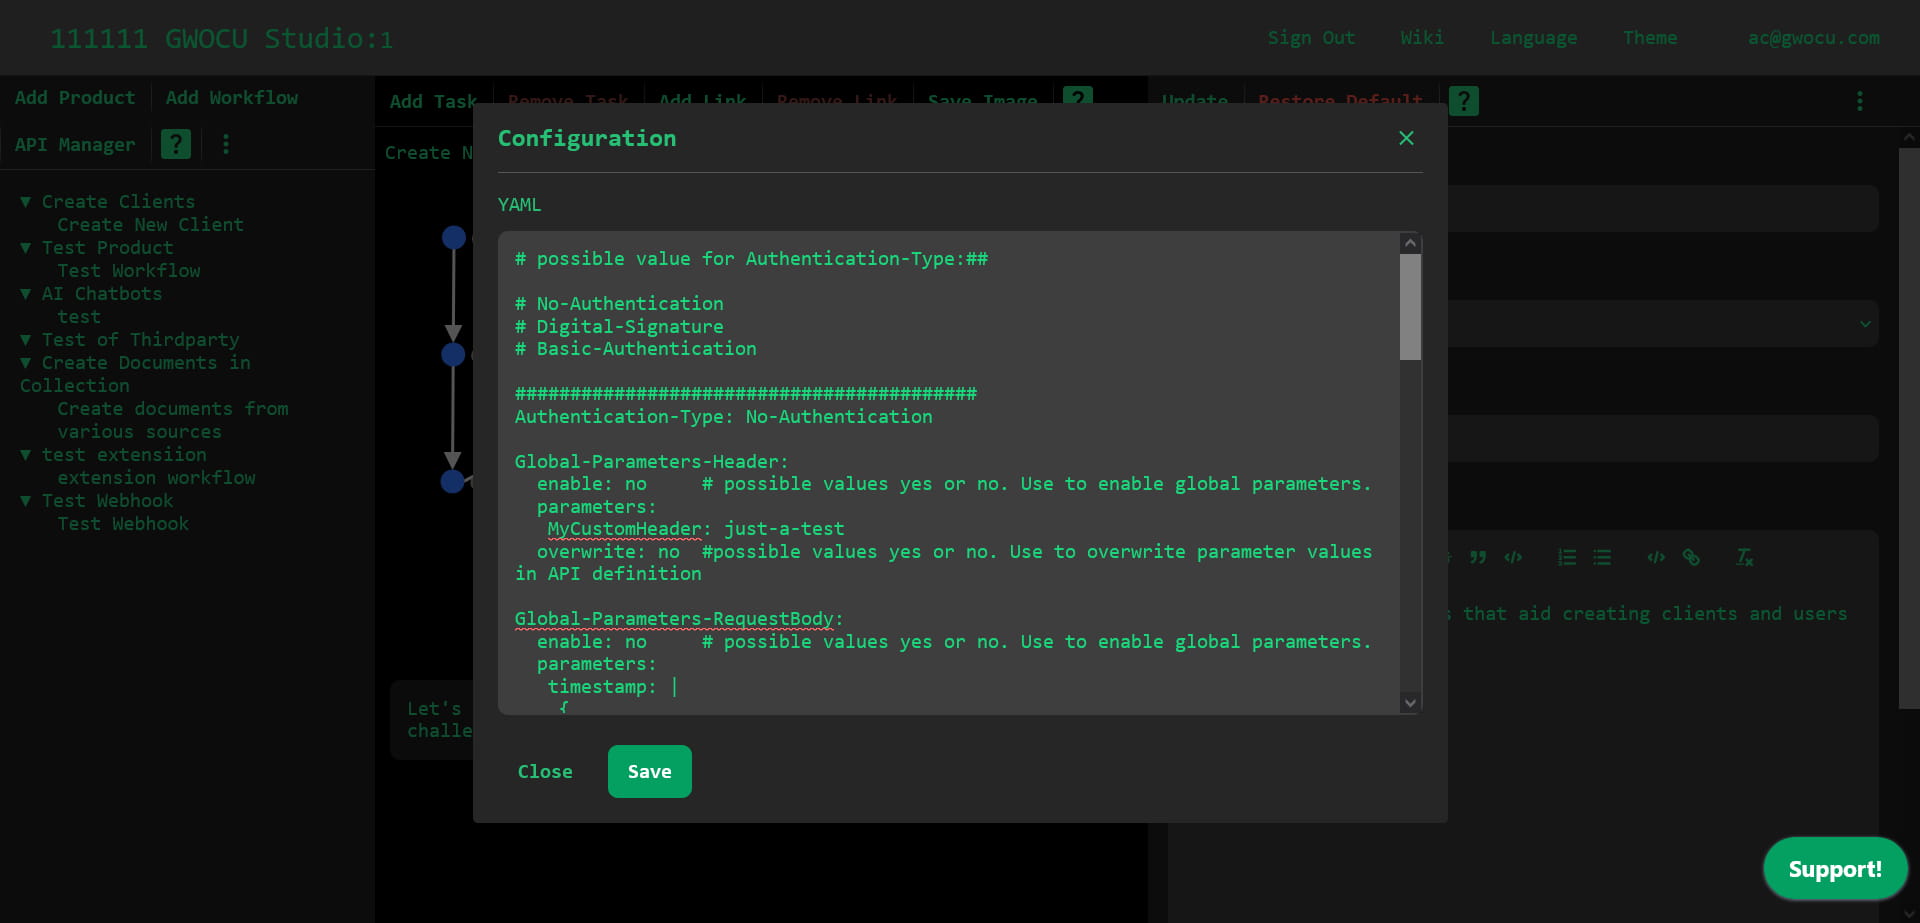
¶ API Actions
This interface allows users to manage API Actions. Any action added on this screen can later be used in an API Definition within the API Manager. Users can add, view, update, or delete API Actions. These kind of actions are particularly useful when integrating external APIs that are not part of the user's own backend or have different authentication methods. If enabled in the API definition by selecting it, API Actions always override Workspace Actions.
¶ Importance of API Actions
An API Action definition may be required when you need to incorporate external APIs into your workflows. These are APIs that are not hosted on your own backend and may have different authentication methods. There are many other use cases where an API action is needed. Each API action definition can have its own details specified in its corresponding YAML configuration file. For instructions on configuring the YAML file, see Action Configuration Files.
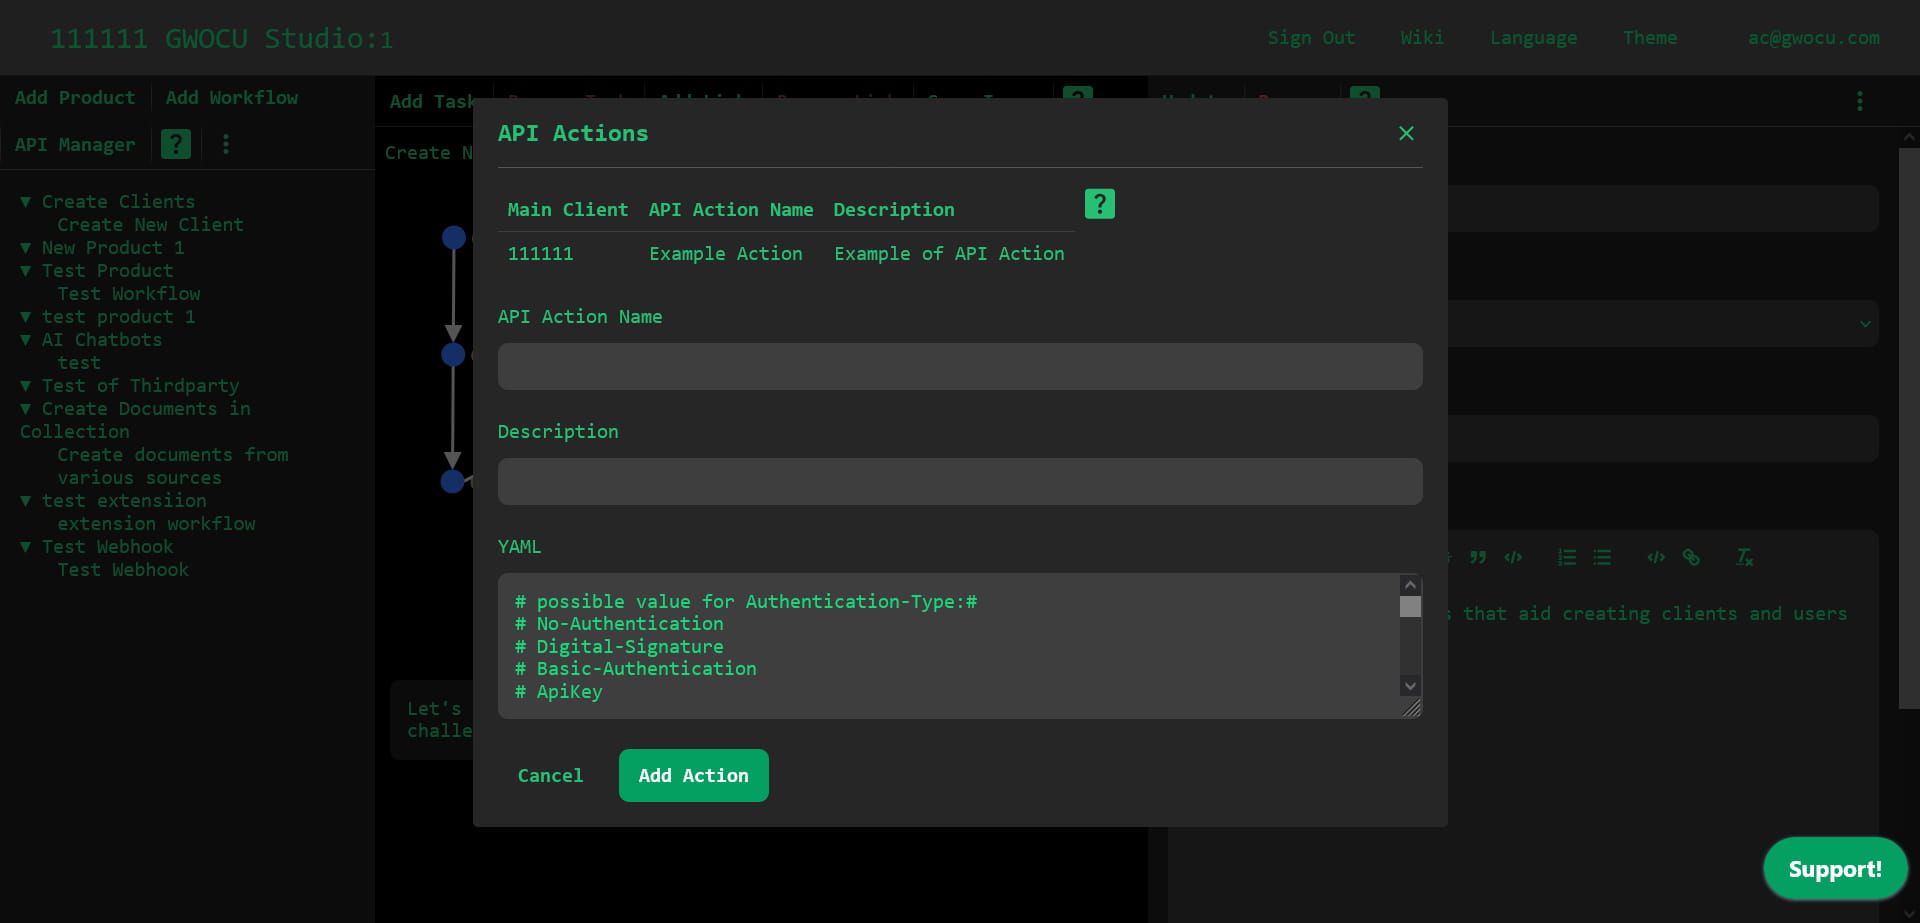
¶ Adding an API Action
To add an API Action record, fill in the name of the definition, description, and YAML data in the respective fields in the form. Once all fields are completed, click the "Add Action" button to register the new API Action.
¶ Updating an Existing API Action
Select an existing API action record from the table by clicking on it. The selected record's details will be loaded into the form. Make any necessary changes and click the "Update" button to save the changes.
¶ Deleting an API Action
With an API action selected, click the "Delete" button to remove the record from the system. This action is irreversible.
¶ Navigating Records
The table displays all API Action records associated with the main client. Click on any record to select it and view or modify its details in the form.
¶ Form Fields
- Client Number: Unique identifier for the client. This field is auto-filled when updating records.
- Name: Name of the API action.
- Description: Brief description of the third party.
- YAML: YAML configuration data for the third party. This field is crucial for defining the authentication method and other configurations necessary for API integration. For more information on action configurations, see Action Configuration Files.
¶ Using the API Action
Once you have defined the API action, you can now use it in the API Manager for one or more API definitions. Just select the API action name for the "API Action" field and save the changes:

¶ Manage Webhooks
Owners and designers can register and manage webhook listeners to monitor and respond to webhook notifications from APIs in their workflows.
¶ Registering a Webhook Listener
To add a Webhook listener record, enter a unique name using only safe characters (alphanumeric and $-_.+!*'()), select a success message type (TEXT, JSON, or HTML) and enter the confirmation message to send upon receiving a notification. The system will generate a URL and a Webhook key, which are required to check notifications. Click the "Add Webhook" button to create the listener.
¶ Updating an Existing Webhook Listener
Select an existing webhook listener record from the table by clicking on it. The selected record's details will be loaded into the form. Make any necessary changes and click the "Update" button to save the changes.
¶ Deleting a Webhook Listener
With a webhook listener record selected, click the "Delete" button to remove the record from the system. This action is irreversible.
¶ Navigating Records
The table displays all webhook listener records associated with the main client. Click on any record to select it and view or modify its details in the form.
¶ Form Fields
- Client Number: Unique identifier for the organization. This field is auto-filled when updating records.
- Name: Unique identifier for the webhook listener. You can't change this value.
- URL: The endpoint URL for webhook notifications, automatically generated using the URL-encoded webhook name.
¶ Using Webhook Listeners
Once you have defined a Webhook listener, you can now register its URL as the endpoint for receiving notifications. Create a task that implements the Check Webhooks system API and send it the webhook listener name and key in the payload to check the latest notification received. To clear the cached notification after you check it, include the reset field set to true in the payload, like this:
{
  "name": "The-Webhook-name",
  "apiKey": "The-Webhook-Key",
  "reset": true
}¶ Export Products
Owners and designers of a workspace can use this option to export all the selected products with all of their associated workflows and APIS. The exported file can be used as a backup, as version control or as a way to copy products from one workspace to other workspaces by using it in combination with the "Import Products" option.
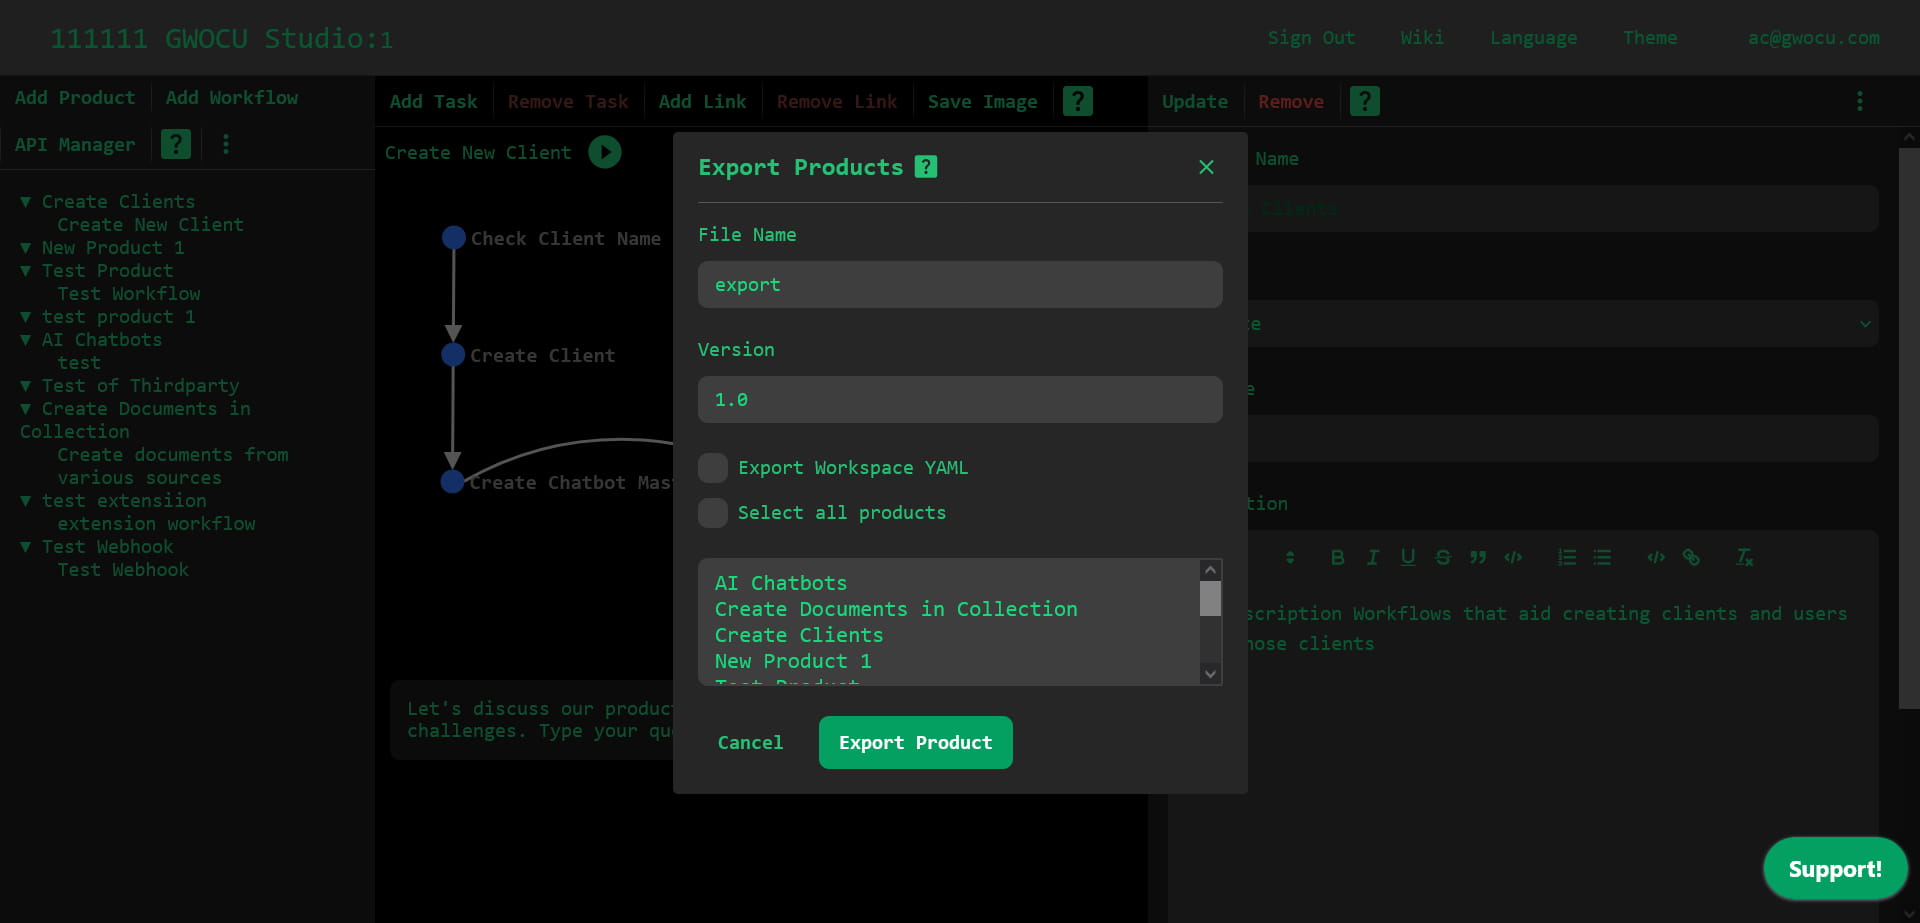
- File Name: Enter the desired name for your exported file in the "File Name" input box. This name will be prefixed to the exported file.
- Version: Specify the version of the export in the "Version" input box.
¶ Selecting Products to Export
- Export All Products: Check the box labeled "Export all Products or choose below" if you wish to export all products. This will automatically select all available products.
- Select Individual Products: If you do not wish to export all products, uncheck the "Export all Products" checkbox and select individual products. You can select multiple products by holding the
Ctrlkey (orCmdon macOS) while clicking.
¶ Exporting Data
- Once you have configured the export settings and selected the desired products, click the "Export" button. This will generate a
.yamlfile containing the data of the selected products along with their associated workflows, tasks, links, and APIs. - The exported file will be downloaded automatically to your device. The file format will be
[FileName]-[Version].yaml.
¶ Uses of the Export Feature
- Version Control: Use the export function to maintain versions of your workspace configurations, allowing you to track changes over time and revert to previous versions if necessary.
- Backup and Restore: Regular exports can serve as backups for your data. In case of data loss or corruption, these exports can be used to restore your workspace to a previous state.
- Exporting and Importing Workflows: Exported files can be used to transfer workflows and other configurations between different workspaces, facilitating easy replication of settings and data across multiple environments.
¶ Troubleshooting
- If you encounter any issues with fetching data or exporting the file, check your Internet connection and try again.
- Ensure JavaScript is enabled in your browser to use all functionalities of the interface.
¶ File Format and Content
The exported file will be in YAML format. It includes detailed information about each selected product, workflows, tasks, links, and APIs as configured in the interface.
For further assistance or technical support, please contact the support team or refer to the help documentation provided with your application.
¶ Import Products
Owners and designers of the workspace can use this option to import a previously products file exported from the Studio. There are various reasons for importing a products file. You may want to restore a previous version of the products. You may want to restore a backup or you may want to import the products into a new workspace.
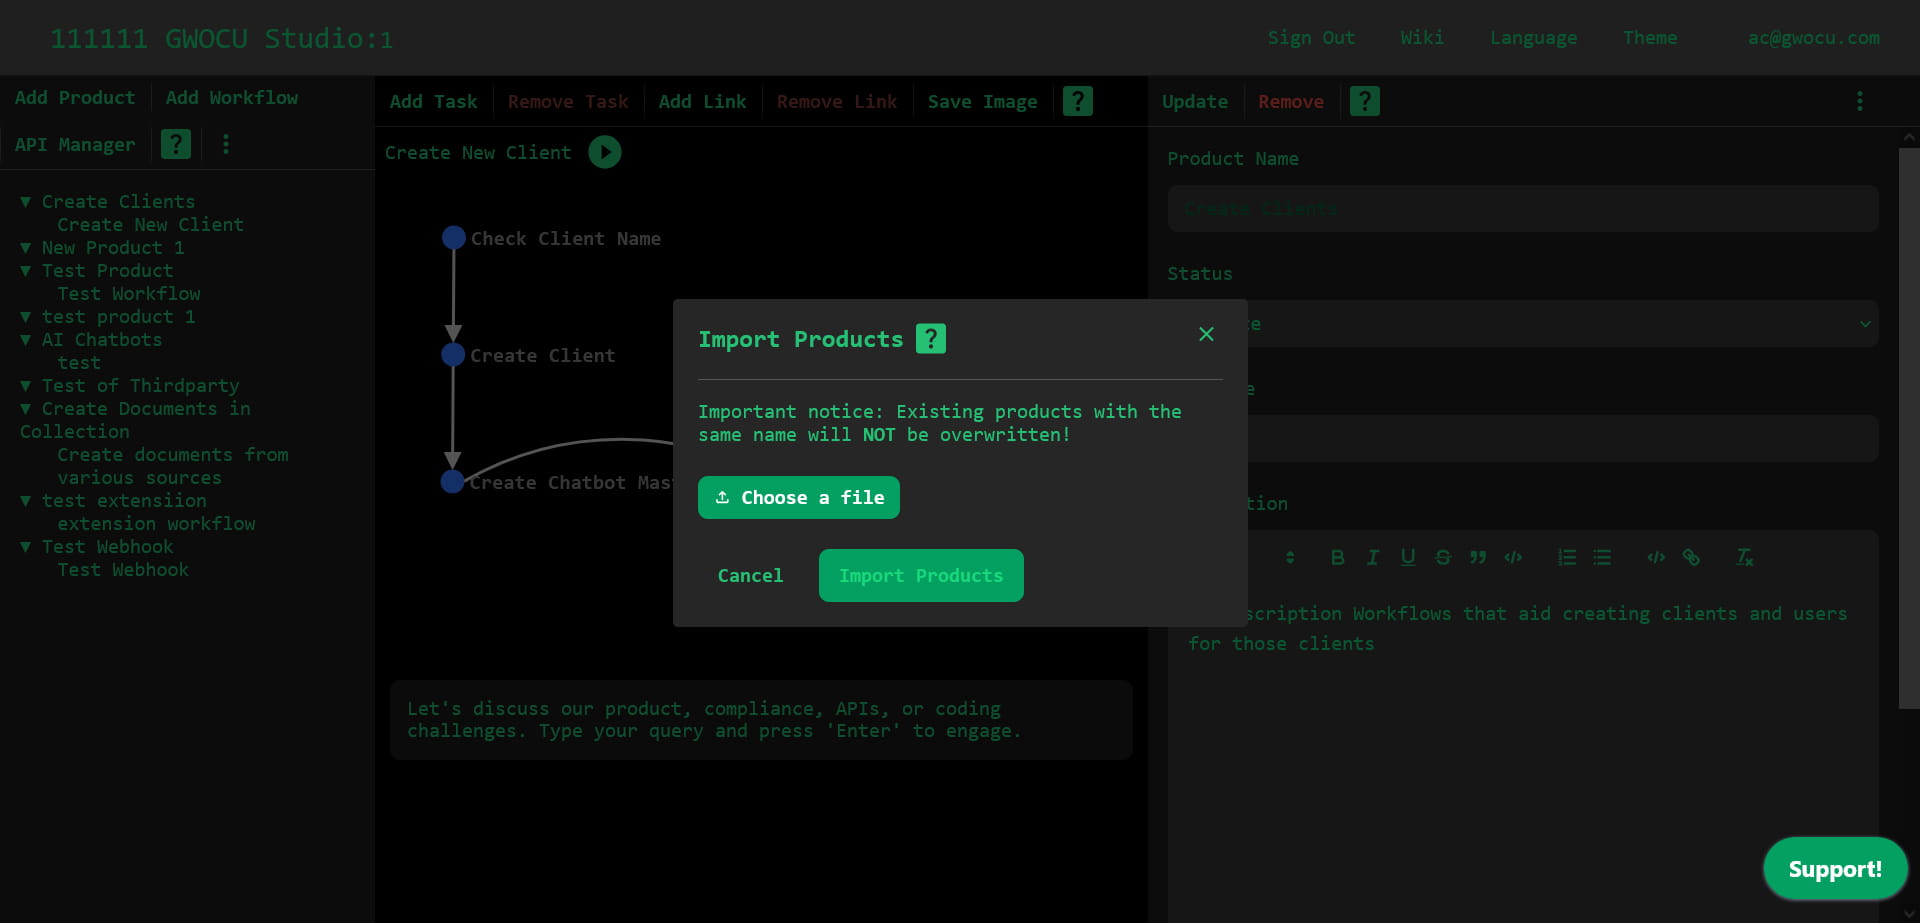
Click on "Choose File" and select the YAML file that you previously exported or that contains the structured data according to the schema used by your workspace. This file should have a .yaml extension or at least be YAML encoded.
¶ Important Notice
Existing products with the same name will NOT be overwritten! This means that if the file you are importing contains products that already exist in the database, these entries will be skipped to prevent duplication or data loss.
¶ Importing Data
- After selecting the file, click the "Import" button to begin the process.
- The system will read the file and begin importing data. Products, workflows, tasks, links, and APIs will be processed. Existing products with the same name will not be overwritten; instead, they will be ignored.
- The system ensures that related data such as workflows, tasks, and links are only imported if their associated products are successfully imported or already exist.
- An alert will pop up to notify you when the import process is complete.
¶ Troubleshooting
- Ensure that the file is in the correct YAML format and adheres to the expected schema.
- If the import process fails or does not start, check the console for errors, ensure that the file is not corrupt, and that it follows the specified format.
- If the import does not complete, verify your Internet connection and try again.
For further assistance or technical support, please contact your system administrator or refer to the help documentation provided with your application. This manual serves as a guideline for importing data and might need adjustments based on specific system configurations or updates.
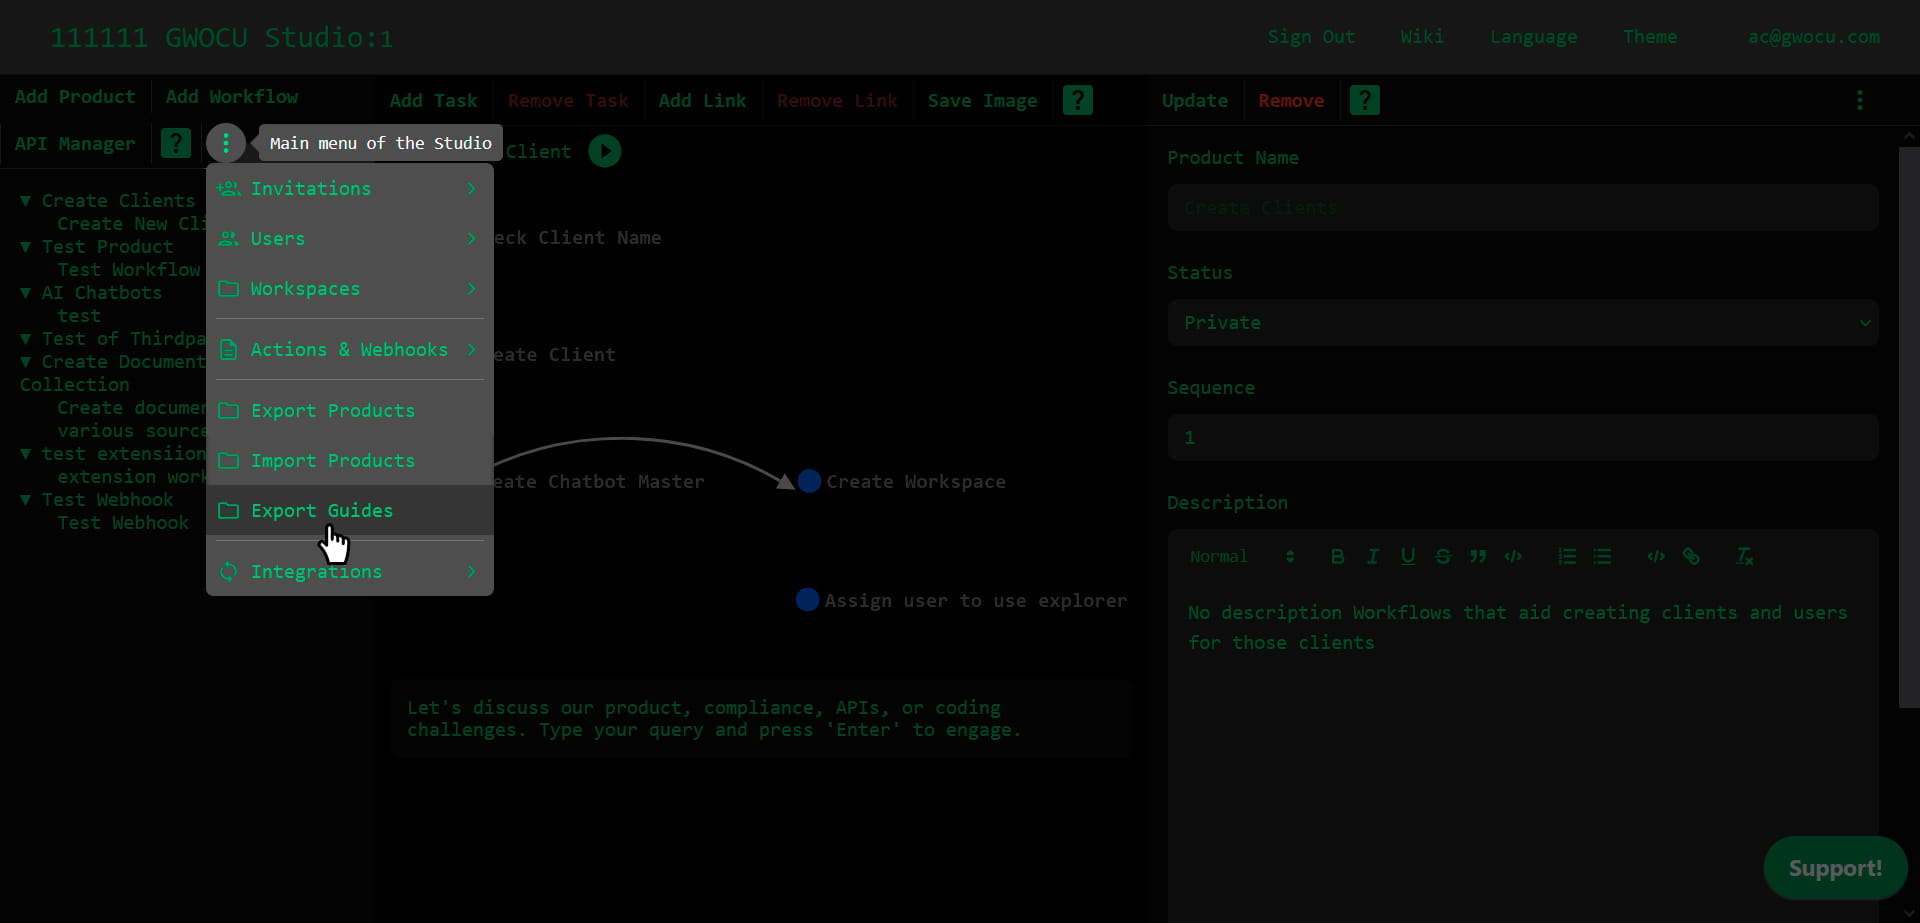
¶ Export Guides
Export Markdown guides containing descriptions, settings, and implementation details for selected products, workflows, tasks, and APIs.
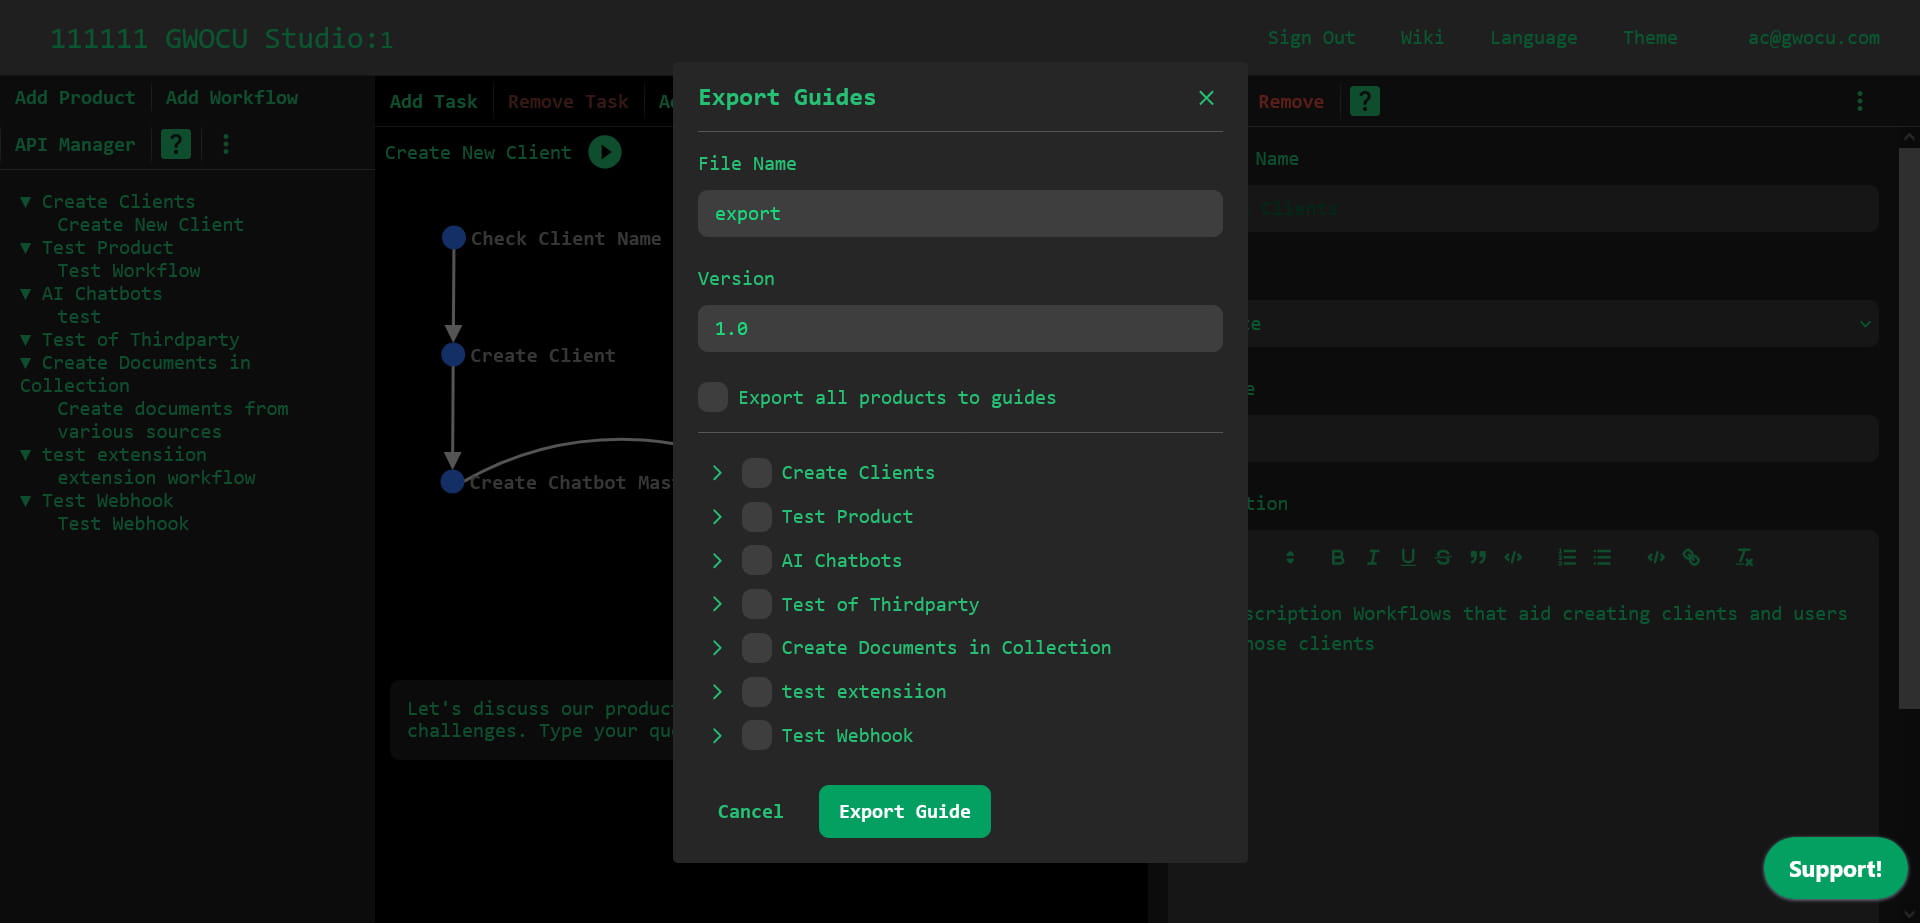
- File Name: Enter the desired name for your exported file in the "File Name" input box. This name will be prefixed to the exported file.
- Version: Specify the version of the export in the "Version" input box.
¶ Selecting Products to Export to Guides
- Export All Products to Guides: Check the box labeled "Export all products to guides" if you wish to automatically include all products, their workflows, tasks and APIs in the exported guide.
- Select Individual Products: To export only selected products and their components, uncheck "Export all products to guides" and manually select the desired products, workflows, and tasks using the checkboxes.
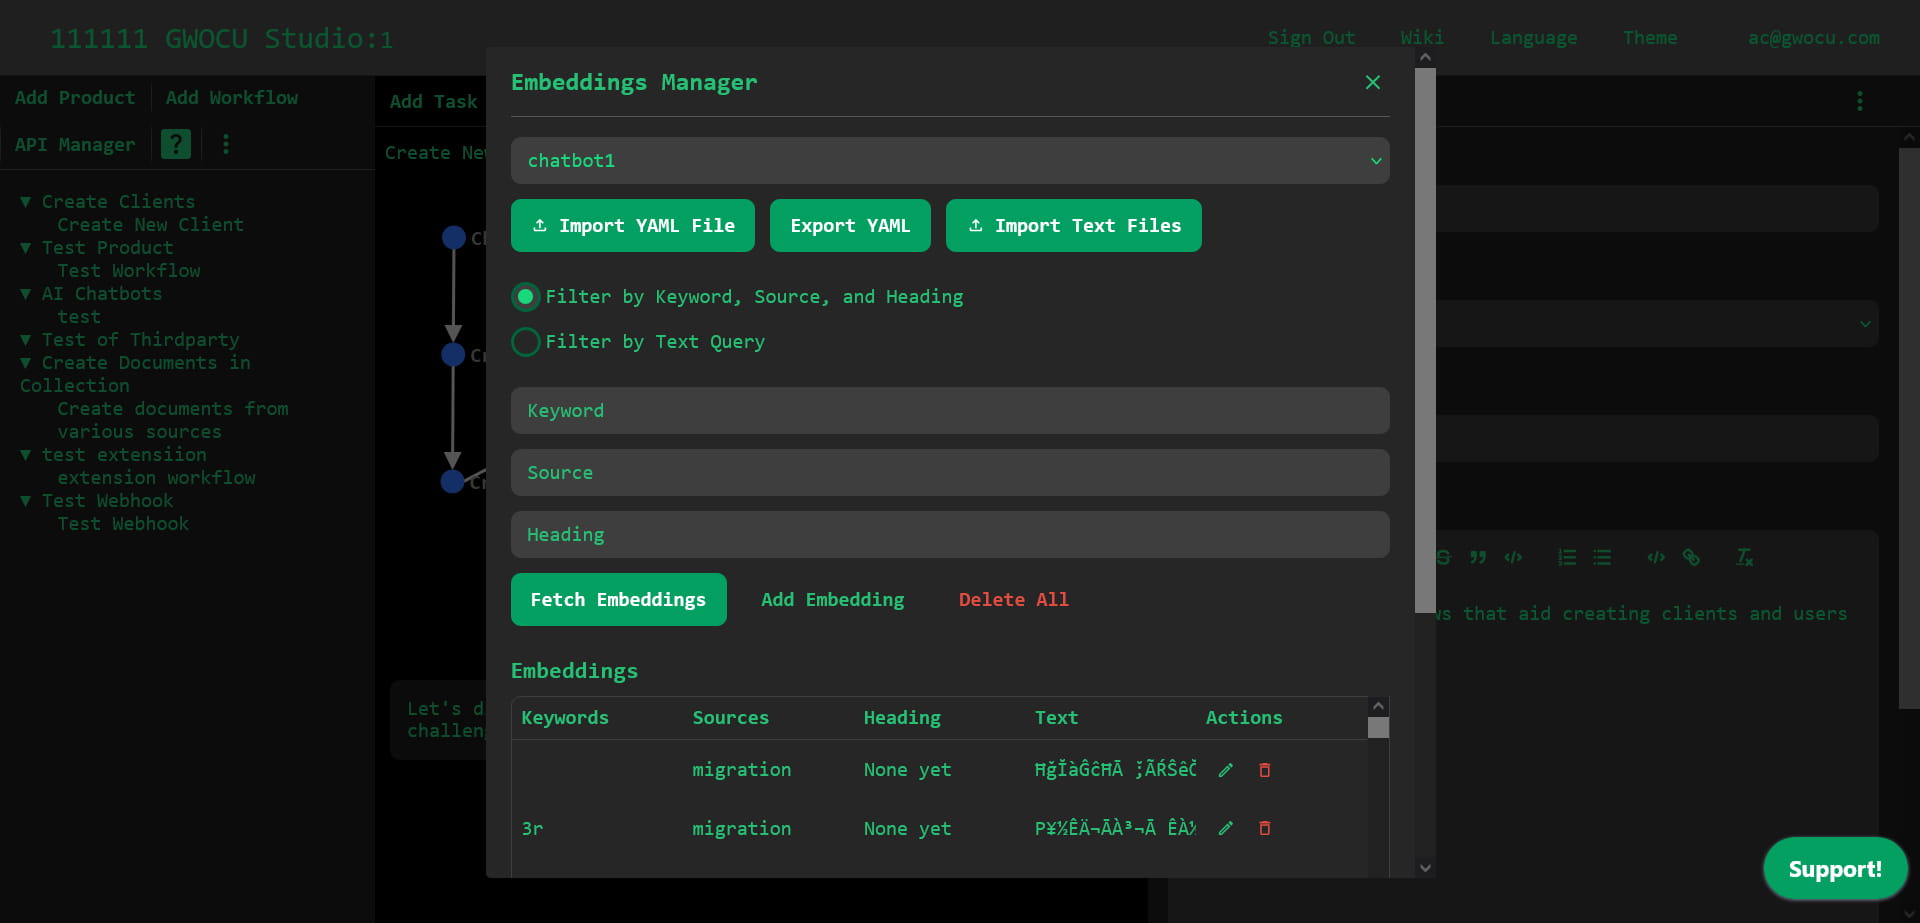
¶ Integrations - Train Your Chatbots
This interface allows you to manage workspace chatbots and their embeddings. Chatbots provide role-based support by answering questions about the platform, documentation, products, workflows, and APIs. Embeddings are text converted into vectors, stored in a vector database, and used to generate responses. Owners and designers can import training files and manage embeddings to enhance chatbot performance.
¶ Enhancing Workspace with Chatbots
Each workspace is equipped with two chatbots, designed to assist different user roles:
- Reader Chatbot: Trained to provide support and information to readers.
- Designer/Owner Chatbot: Trained to assist designers and owners with more complex queries and tasks.
You can train these chatbots with documents specific to your workspace to enhance their effectiveness and relevance.
¶ Importing and Exporting Training Files
There are 2 kinds of training files: YAML files generated by the platform through the "Export YAML" button, and TXT files with plain text content. YAML files are used to import multiple embeddings from a single file, while TXT files are used to create a single embedding per file.
¶ Adding an Embedding
Click "Add Embedding" to open the embedding creation dialog. Enter the embedding details in the form fields: keywords, source, heading, and text. Click "Add Embedding" to confirm and save the new embedding.
¶ Search Embeddings
You can search embeddings by keywords, source and heading, or by text similarity. Choose a search type, enter a query or leave it empty to list all embeddings for the selected chatbot. Click "Fetch Embeddings" to display the matching results in the "Embeddings" table at the bottom of the dialog.
¶ Edit Embeddings
Click the "Edit Embedding" button in the "Actions" column of the target row. Modify the details and click "Save Changes".
¶ Delete Embeddings
Click the "Delete Embedding" button in the "Actions" column of the target row to remove an embedding.
¶ Security Considerations
Ensure that all activities within the workspace adhere to your organization's security policies. This includes the management of sensitive information within API definitions and documents used for training chatbots.